Contacts Dashboard
Learn how to create, manage, and upload bulk contacts using the Contacts Dashboard in Kipps.ai, including custom fields for personalized campaigns and agent interactions.
Overview
The Contacts Dashboard provides a centralized place to manage all your contacts. You can add contacts manually, create custom fields, upload contacts in bulk via CSV, and view or update existing records.
The Contacts section allows you to create, manage, and enrich individual contacts for targeted campaigns and AI agent interactions. This helps you maintain a centralized contact database and personalize outreach effectively.
Step-by-Step Guide
1. Navigate to the Contacts Tab
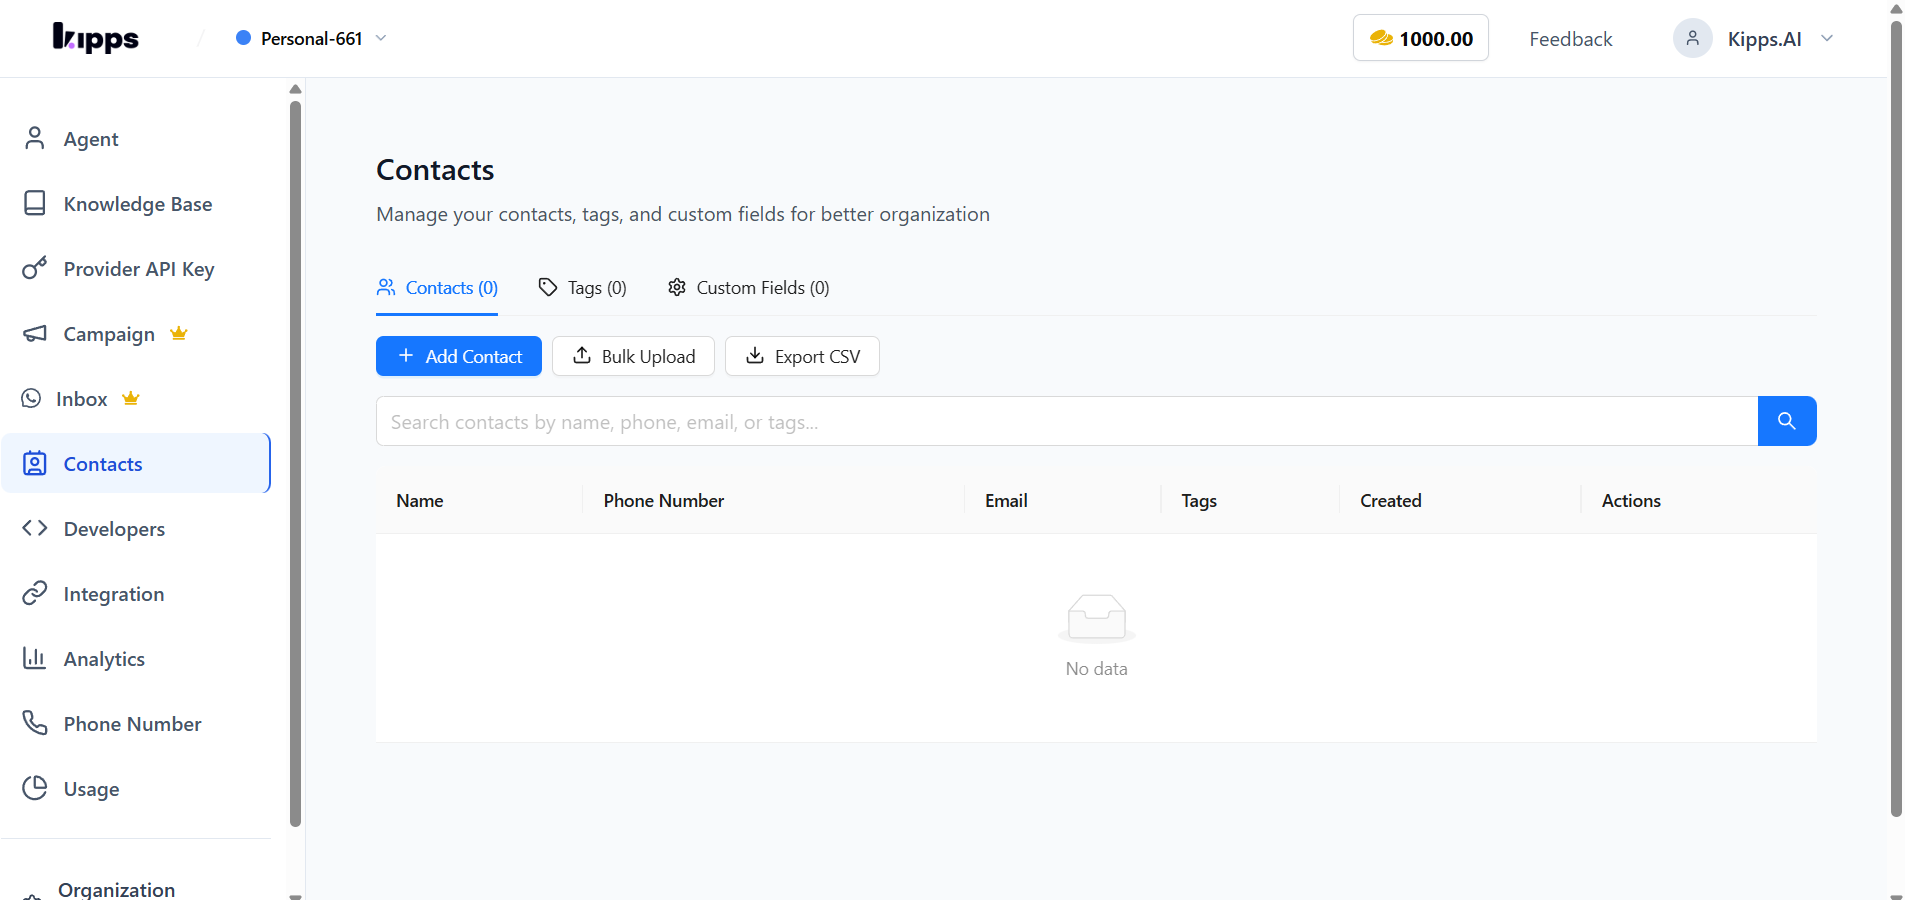
- From your Kipps.ai dashboard, go to the left-hand side menu.
- Click on the Contacts tab to access the Contacts Dashboard.
2. Creating a Contact Manually
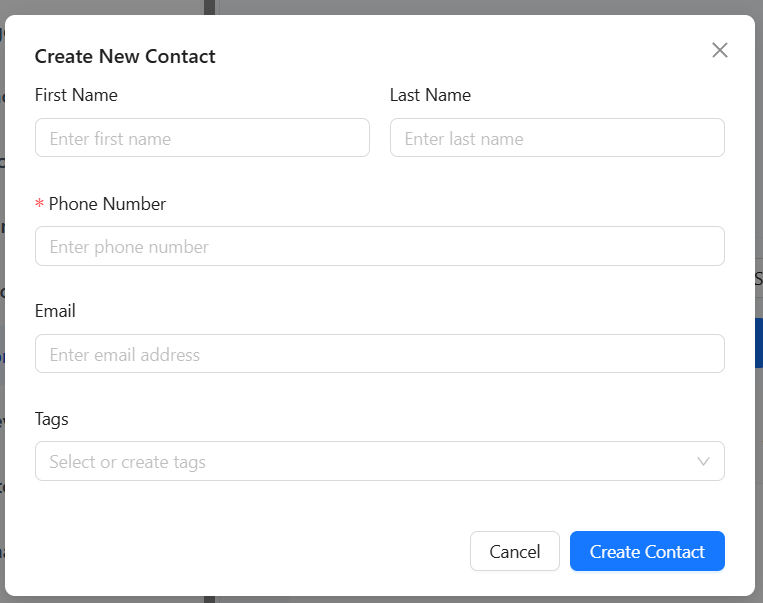
- Click the Add Contact button.
- Enter:
- First Name
- Last Name
- Phone Number
- Tags (optional)
- Click Create to save the contact.
 Your contact will now appear in the Contacts list.
3. Viewing Contacts
-
If no contacts exist, you’ll see an empty state showing zero contacts.
-
Once contacts are added, they appear in a table view with pagination.
-
You can browse contacts page by page and view total records uploaded.
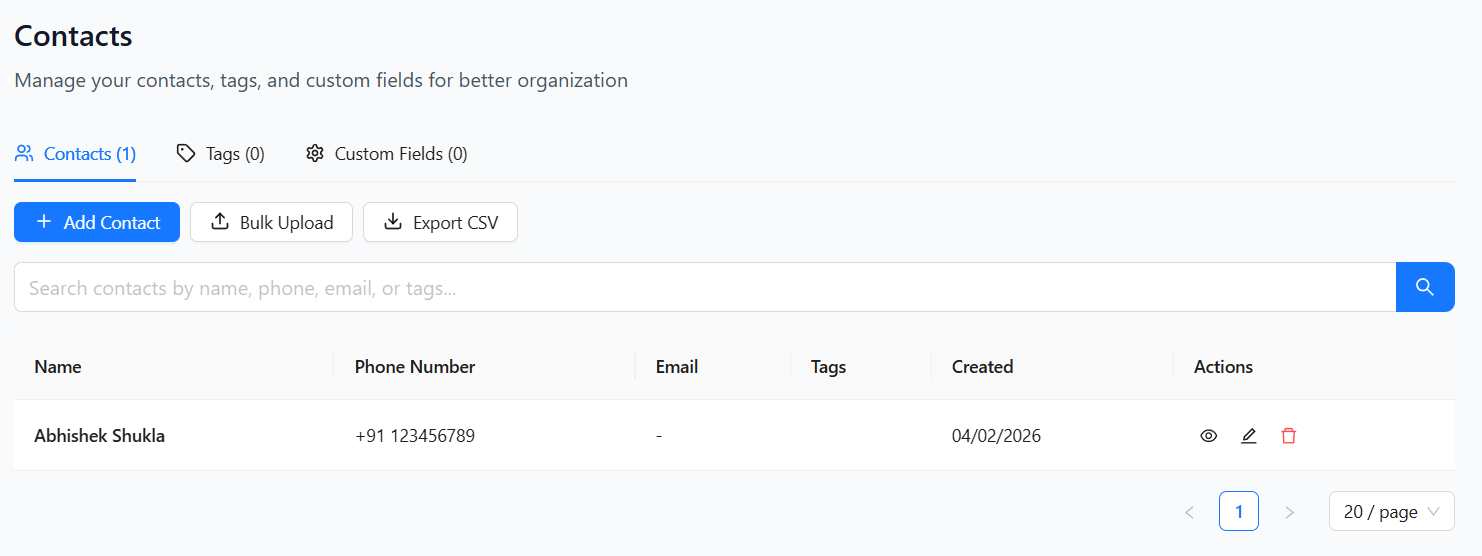 Each contact includes:
 -
First Name
-
Last Name
-
Phone Number
-
Email
-
Tags
-
Custom Fields (if any)
4. Creating Custom Fields
Custom fields allow you to store additional information such as Date of Birth, Order ID, or Codes.
Add a Custom Field
- Go to Custom Fields
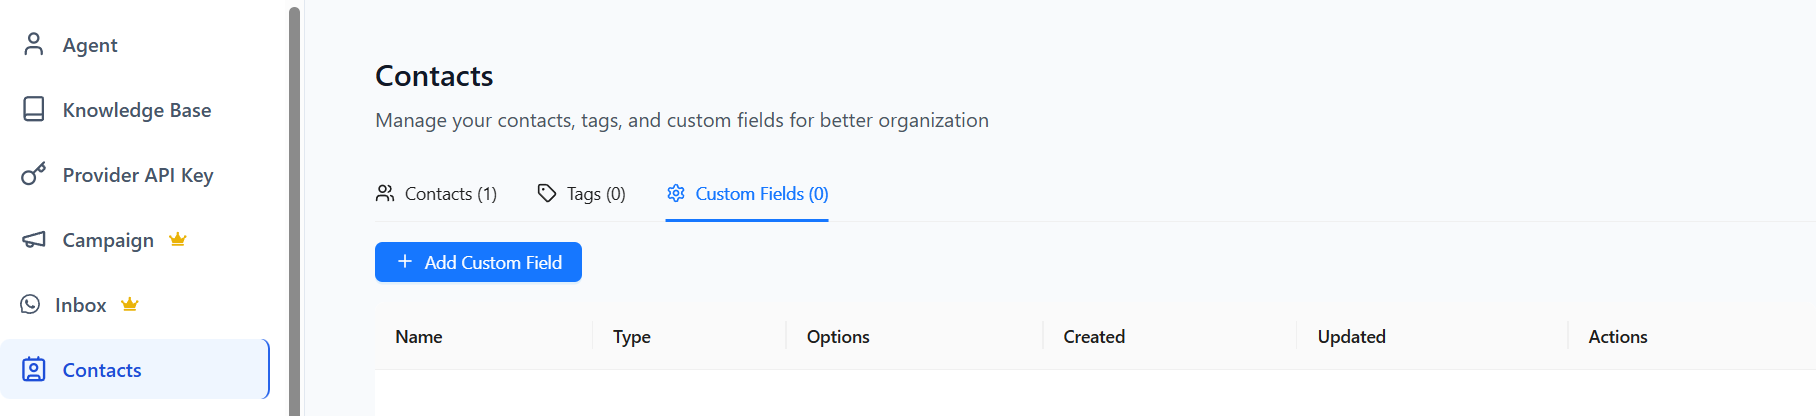
- Click Add Custom Field
- Enter:
- Field Name (e.g., Date of Birth, Order ID, Code)
- Field Type (Text, Date, etc.)
- Click Create
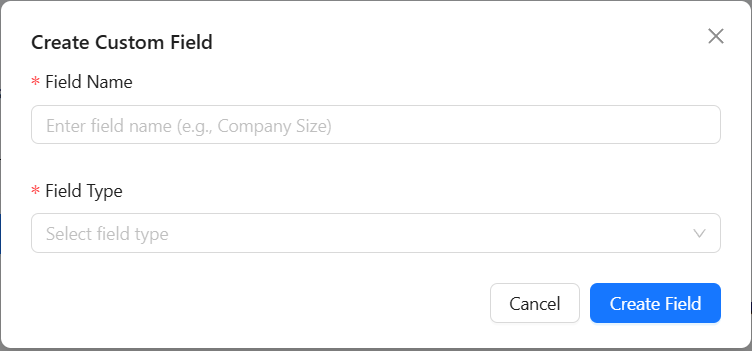
Note: Only organization admins can create custom fields. Members must request their admin to add them.
You can create unlimited custom fields based on your business needs.
5. Bulk Uploading Contacts
Adding contacts one by one is not scalable. Kipps.ai supports bulk uploads via CSV.
Download CSV Template
- Click Bulk Upload
- Download the sample CSV to understand required formatting.
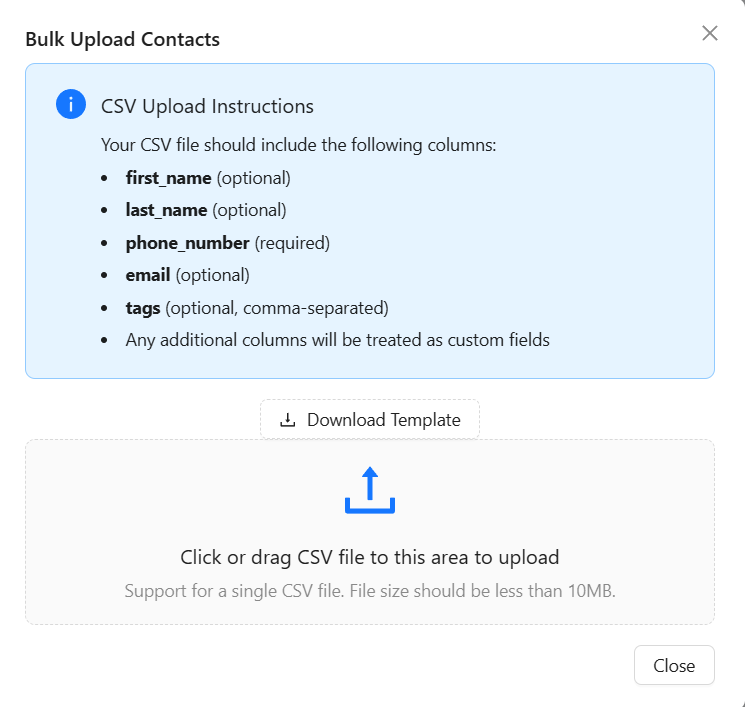
Required fields typically include:
- Phone Number
- First Name / Last Name
Custom fields can also be included as columns.
Upload CSV File
- Click Bulk Upload
- Select or drag your CSV file.
After upload:
- A preview of the first five rows appears.
- Map each CSV column to Kipps contact fields:
- Phone Number
- First Name
- Last Name
- Tags
- Custom Fields (Order ID, Code, Date of Birth, etc.)
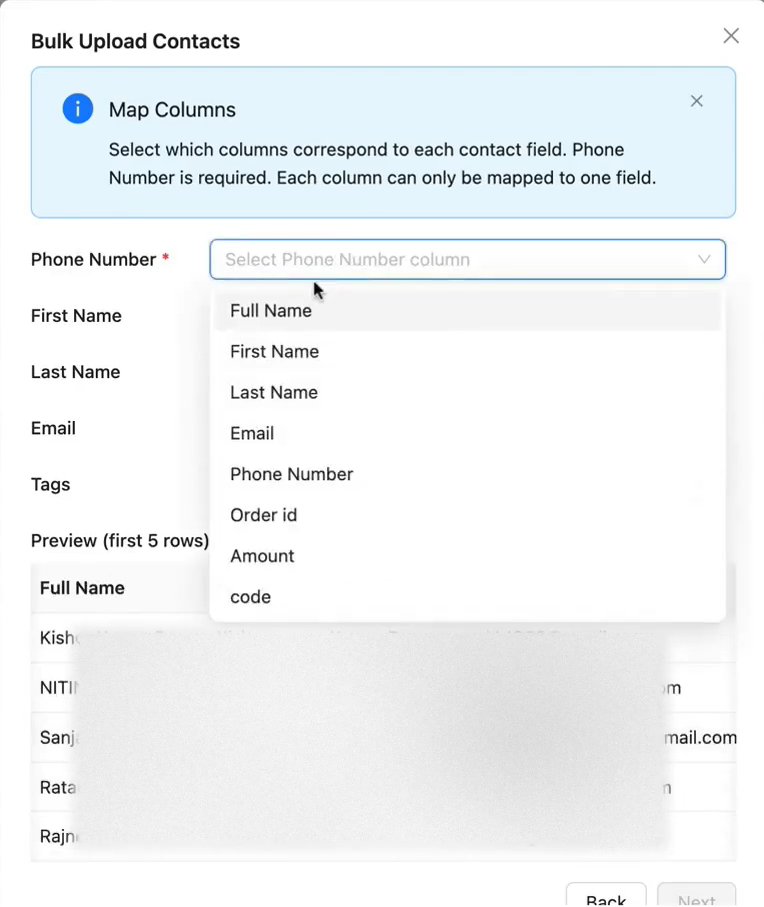
Submit Upload
- After mapping, click Next
- Kipps processes the file and shows: - Total rows - Successfully created contacts - Skipped records (commonly due to invalid phone numbers)
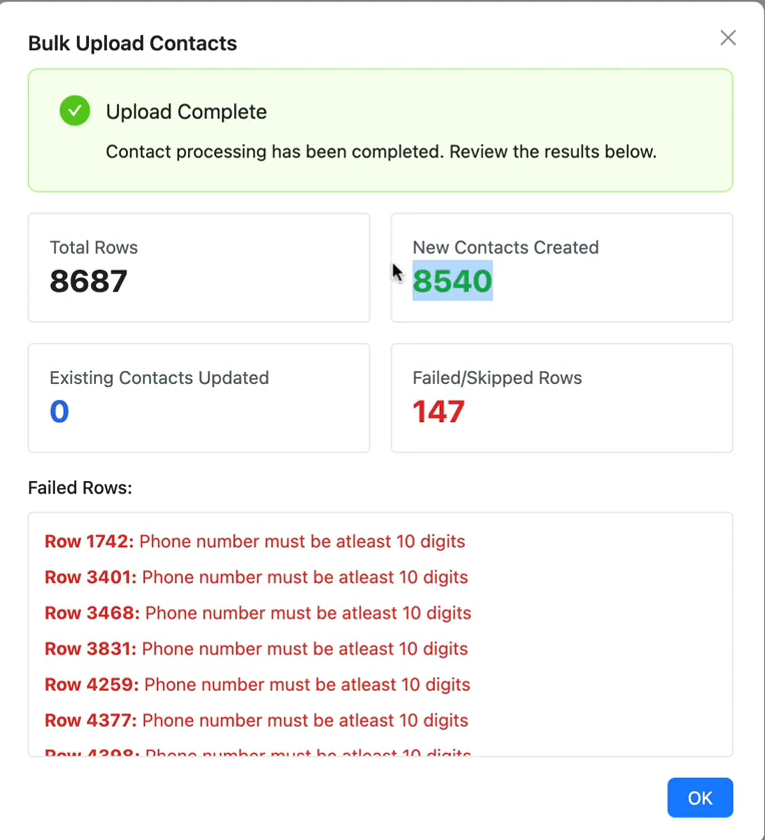 Click OK to complete the process.
Your contacts will now appear in the dashboard.
Best Practices
- Phone Format: Ensure valid 10-digit or international phone numbers.
- Use Custom Fields: Store business-specific data like Order ID or DOB.
- Bulk First: Prefer CSV uploads for large datasets.
- Admin Access: Only admins can create custom fields.
- Data Hygiene: Clean CSVs before uploading to reduce skipped records.
Next Steps
- Use contacts directly in campaigns.
- Personalize AI agent conversations using custom fields.
- Keep your contact database updated for better engagement and conversions.
Troubleshooting
My CSV upload shows a high number of "Skipped Records". Skipped records are usually caused by invalid phone numbers (missing country code, wrong format, or blank values) or duplicate entries already in the system. Download the error report after upload to see which rows were skipped and why. Fix the formatting and re-upload.
The column mapping screen doesn't show my custom fields. Custom fields must be created in the Contacts section (Custom Fields tab) before they appear as mapping options during CSV upload. Ask your organization admin to create the required fields first.
I uploaded a CSV but the contacts are not appearing in the dashboard. Check the upload result screen for a success/failure summary. If the upload reported errors, the contacts may not have been created. Verify the CSV has the required phone number and name columns, and retry the upload.
A contact's phone number is correct but campaigns are still failing for them.
Confirm the phone number is in the correct format for your telephony provider (E.164 format: +CountryCodeNumber). Also check if the contact has opted out of communications—opted-out contacts are automatically skipped.
Frequently Asked Questions
Is there a limit to how many contacts I can upload in one CSV file? The maximum number of contacts per bulk upload depends on your Kipps.AI subscription plan. For very large lists, split the CSV into multiple files and upload them in batches.
Can I update existing contacts by re-uploading a CSV? Yes. If the uploaded CSV includes phone numbers that already exist in your contact database, the system will update those records with the new data rather than creating duplicates.
What file encoding should my CSV use? Use UTF-8 encoding. Files exported from Microsoft Excel may use a different encoding by default—choose "Save as CSV UTF-8" when exporting from Excel to ensure special characters (accented letters, non-ASCII names) are preserved.
Can I create custom fields and use them immediately in a campaign? Yes. Once a custom field is created and contacts have values for it, you can reference those values in your campaign's System Prompt or Initial Message for personalization.
Who can create custom fields—all users or only admins? Only organization admins can create custom fields. Team members should request their admin to add the required fields before uploading contacts that include those field values.
Related Articles