Message Nodes
A friendly guide to the five message nodes in the WhatsApp Flow builder (Text Message, CTA / URL, Media, Template and WhatsApp Flow) with use cases, settings and tips.
Message nodes are the nodes that send something to your customer. They are the voice of your flow: greetings, answers, files, links and forms.
In the flow builder, you will find them under MESSAGES in the left-hand panel:
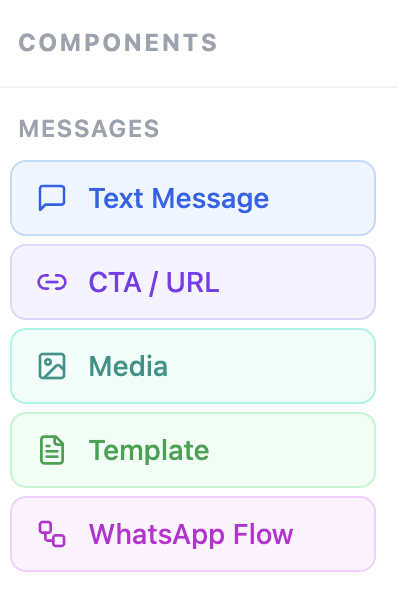
| Node | What it sends | Waits for a reply? |
|---|---|---|
| Text Message | One or more plain text messages | No |
| CTA / URL | A message with a button that opens a link | No |
| Media | An image, video or document | No |
| Template | An approved WhatsApp template | No |
| WhatsApp Flow | An in-chat form built with Meta's Flow builder | Yes |
Starting the conversation: every flow begins at the Conversation Start node (the entry point of the flow). To send the customer a first message, connect Conversation Start to a message node, for example Text Message. A message node can't be the first thing in a flow on its own, so always draw a line from Conversation Start to your opening message node.
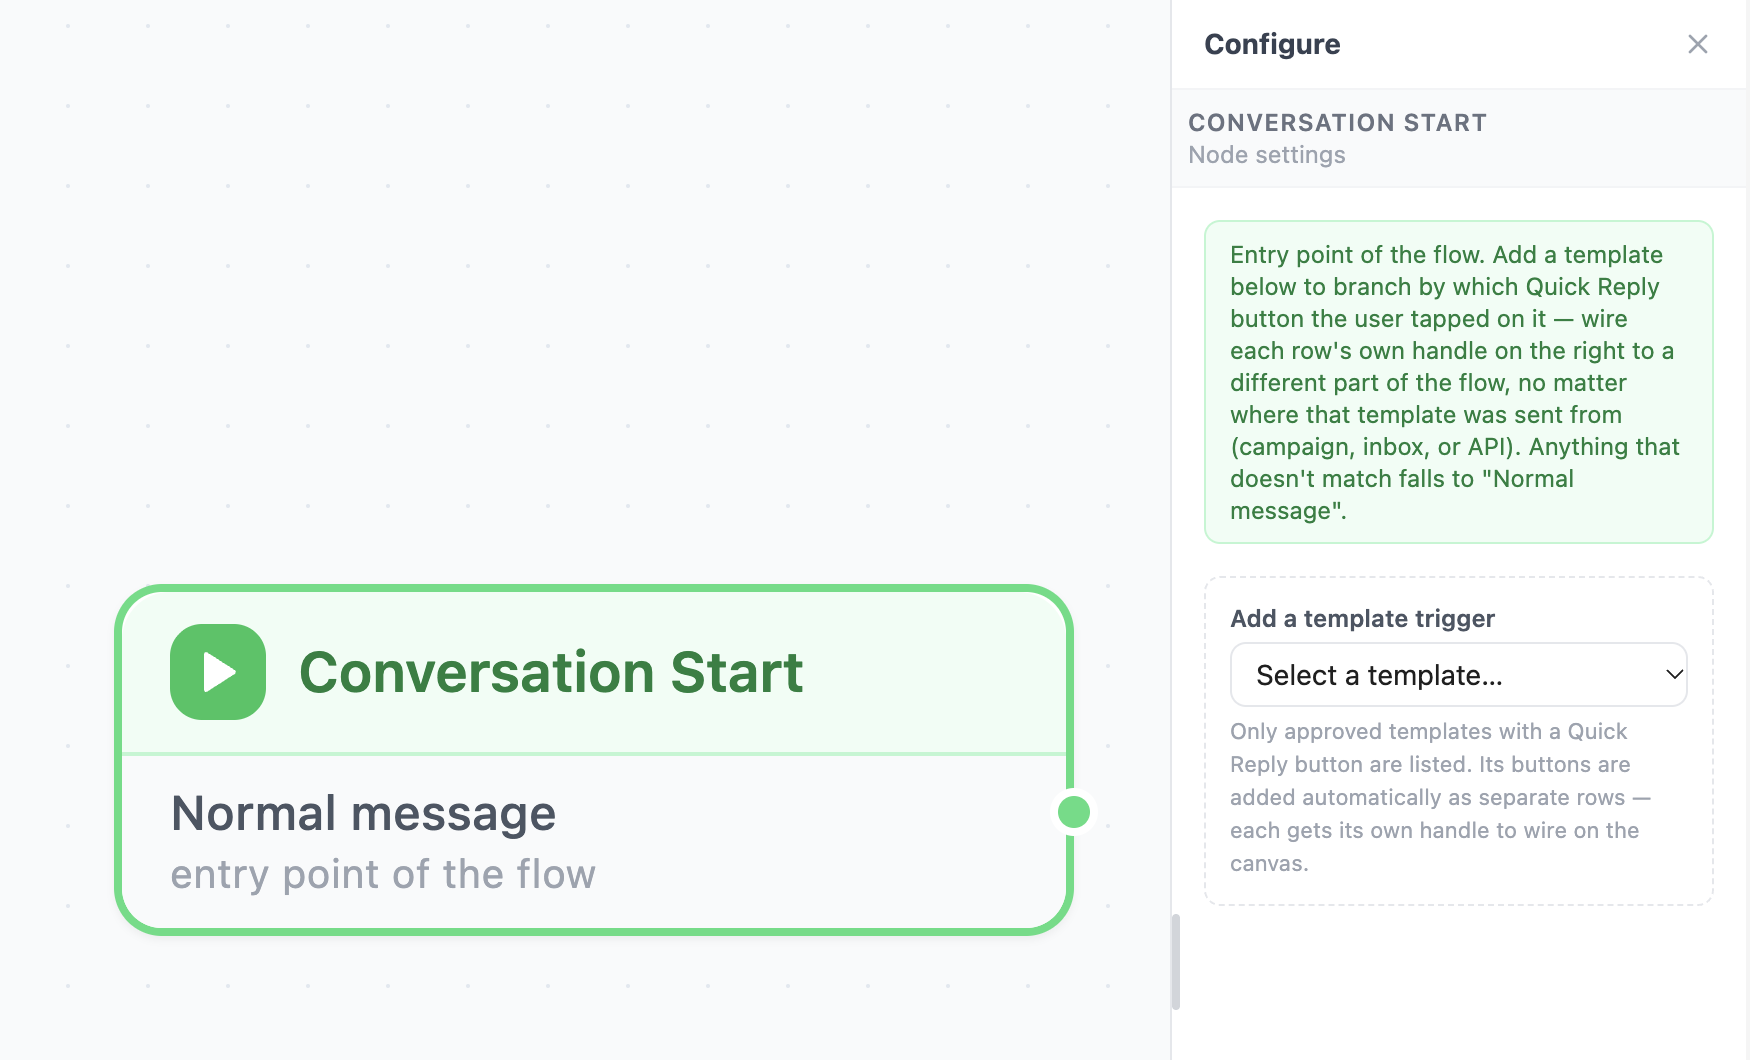
Remember: most message nodes send and move on straight away. If you want to wait for the customer to answer, follow the message with an Ask & Collect node such as Reply Buttons, List / Menu or Text Input.
Before you start
- Your WhatsApp Business account is connected to Kipps.AI.
- You have opened your WhatsApp Agent and created a flow. Every flow starts from a Conversation Start node.
- To add a node, drag it from the left panel onto the canvas, then draw a line from the previous node's right dot to the new node's left dot.
- Click a node to open its settings on the right. Remember to save your flow.
Using variables in your messages
Wherever you see a text box in a message node, you can type a variable in double curly braces. Kipps replaces it with the real value for each customer.
| You write | The customer sees |
|---|---|
Hi {{name}}, welcome! | Hi Priya, welcome! |
Your booking is on {{date}} | Your booking is on 24 Oct |
{{name}}is filled in automatically from the customer's WhatsApp profile name.- Other variables come from earlier nodes. For example, a Text Input node can save the customer's answer to
{{email}}. - If a variable has no value yet, it is simply left blank. The customer never sees the raw
{{...}}text.
Text Message
What it does
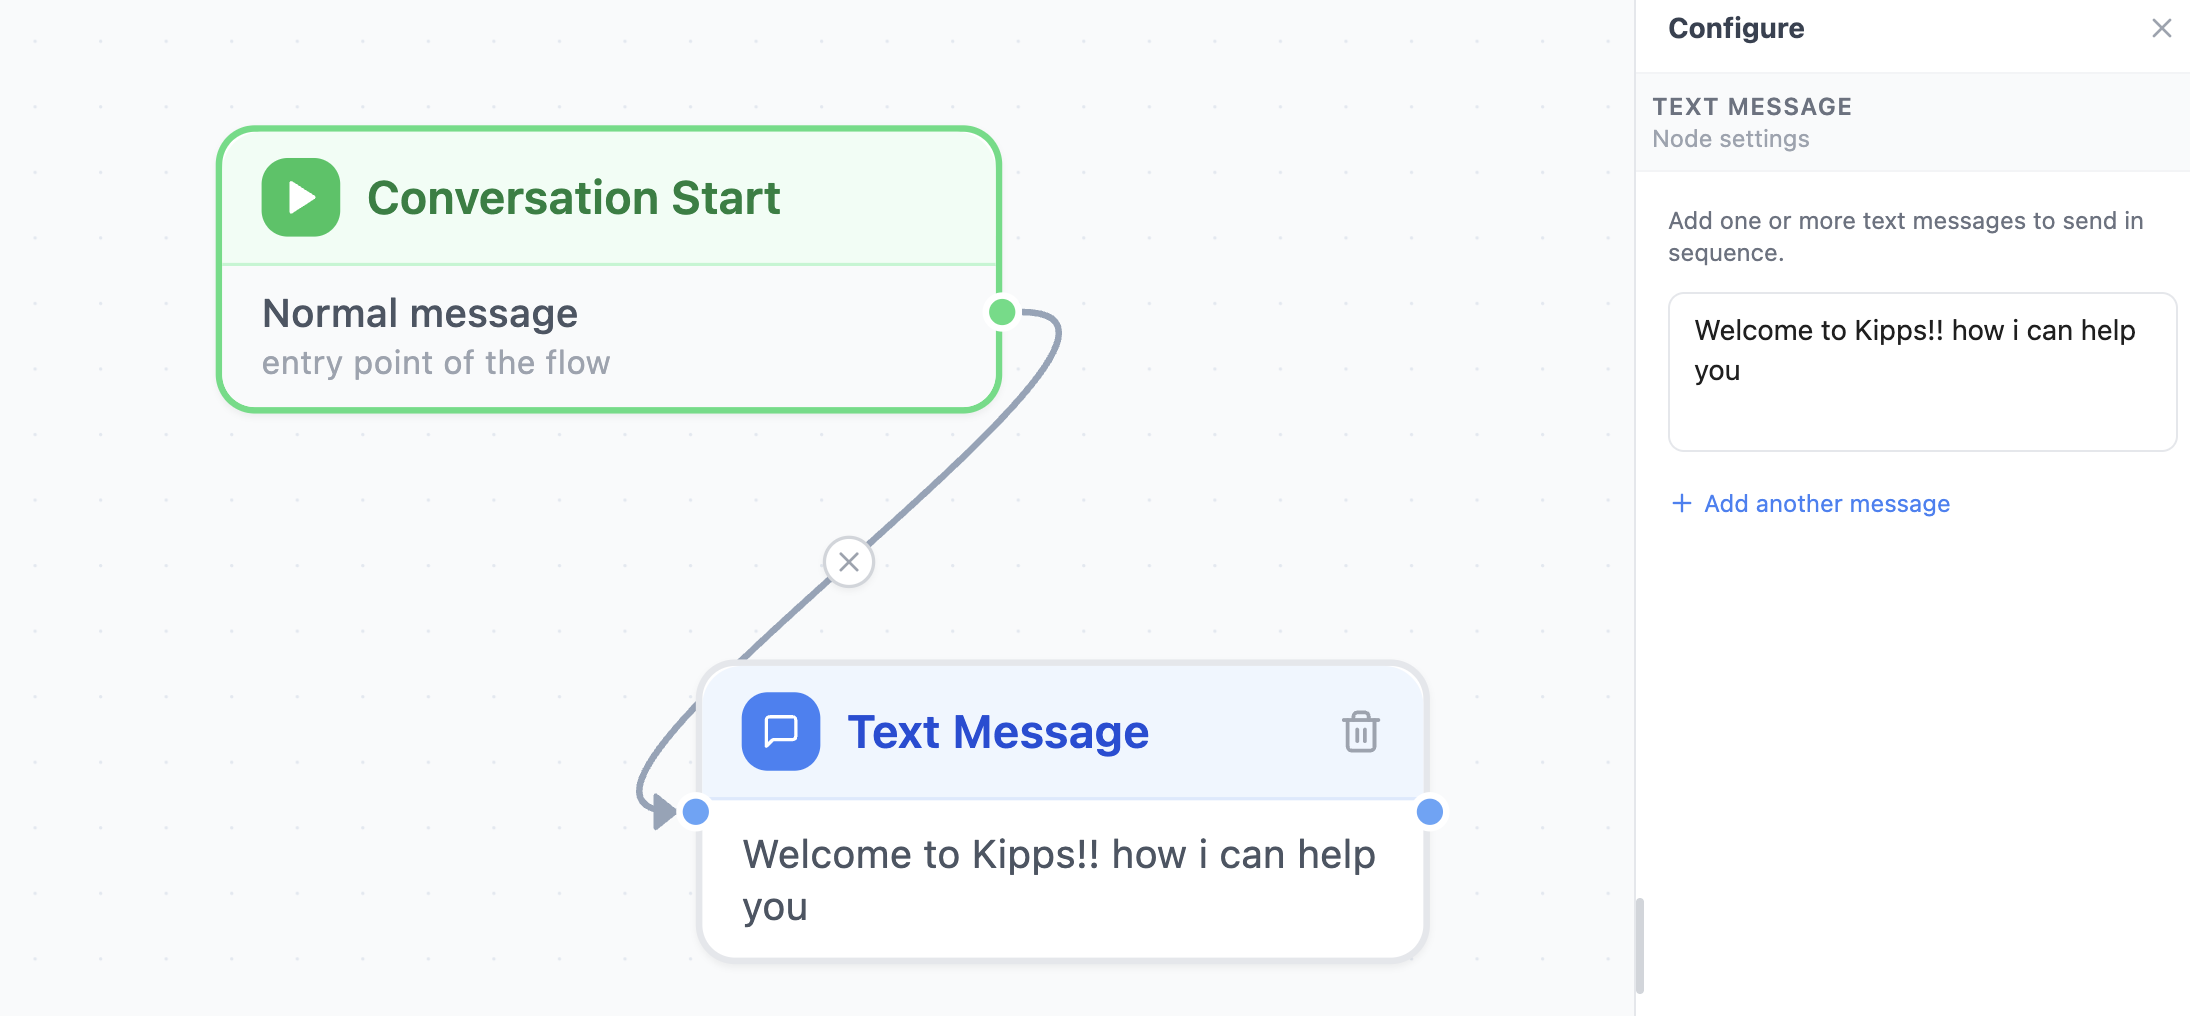
Sends plain text to the customer. You can add several messages in one node, and they are sent one after another in the order you wrote them.
When to use it
- Greeting a new customer: "Hi
{{name}}, welcome to Sunrise Dental 👋" - Explaining what happens next: "Great, I'll ask you three quick questions."
- Sending information such as working hours, an address or a price
- Closing a conversation: "Thanks! Our team will call you shortly."
How to set it up
- Drag Text Message onto the canvas and connect it to the previous node.
- Click the node and type your message in the box.
- To send another message straight after, click Add another message.
- Use variables like
{{name}}to personalise.
Settings
| Setting | What to enter |
|---|---|
| Message | The text to send. Each message can be up to 4,096 characters. |
| Add another message | Adds an extra bubble that is sent right after the first one |
Works well with
| Place it... | Use this node | Why |
|---|---|---|
| Before | Conversation Start | Send a welcome as soon as the chat begins |
| After | Reply Buttons, List / Menu, Text Input | The text message explains, then the next node asks |
| After | Text Input | Repeat what the customer typed back to them: "Thanks {{name}}!" |
| Before | End Chat | Say goodbye, then close the conversation |
Tips
- Keep each message short. Several short bubbles read better on a phone than one long block.
- Empty messages are skipped, so you will not send a blank bubble by accident.
- A Text Message does not wait for an answer. If you need a reply, add an Ask & Collect node after it.
CTA / URL
What it does
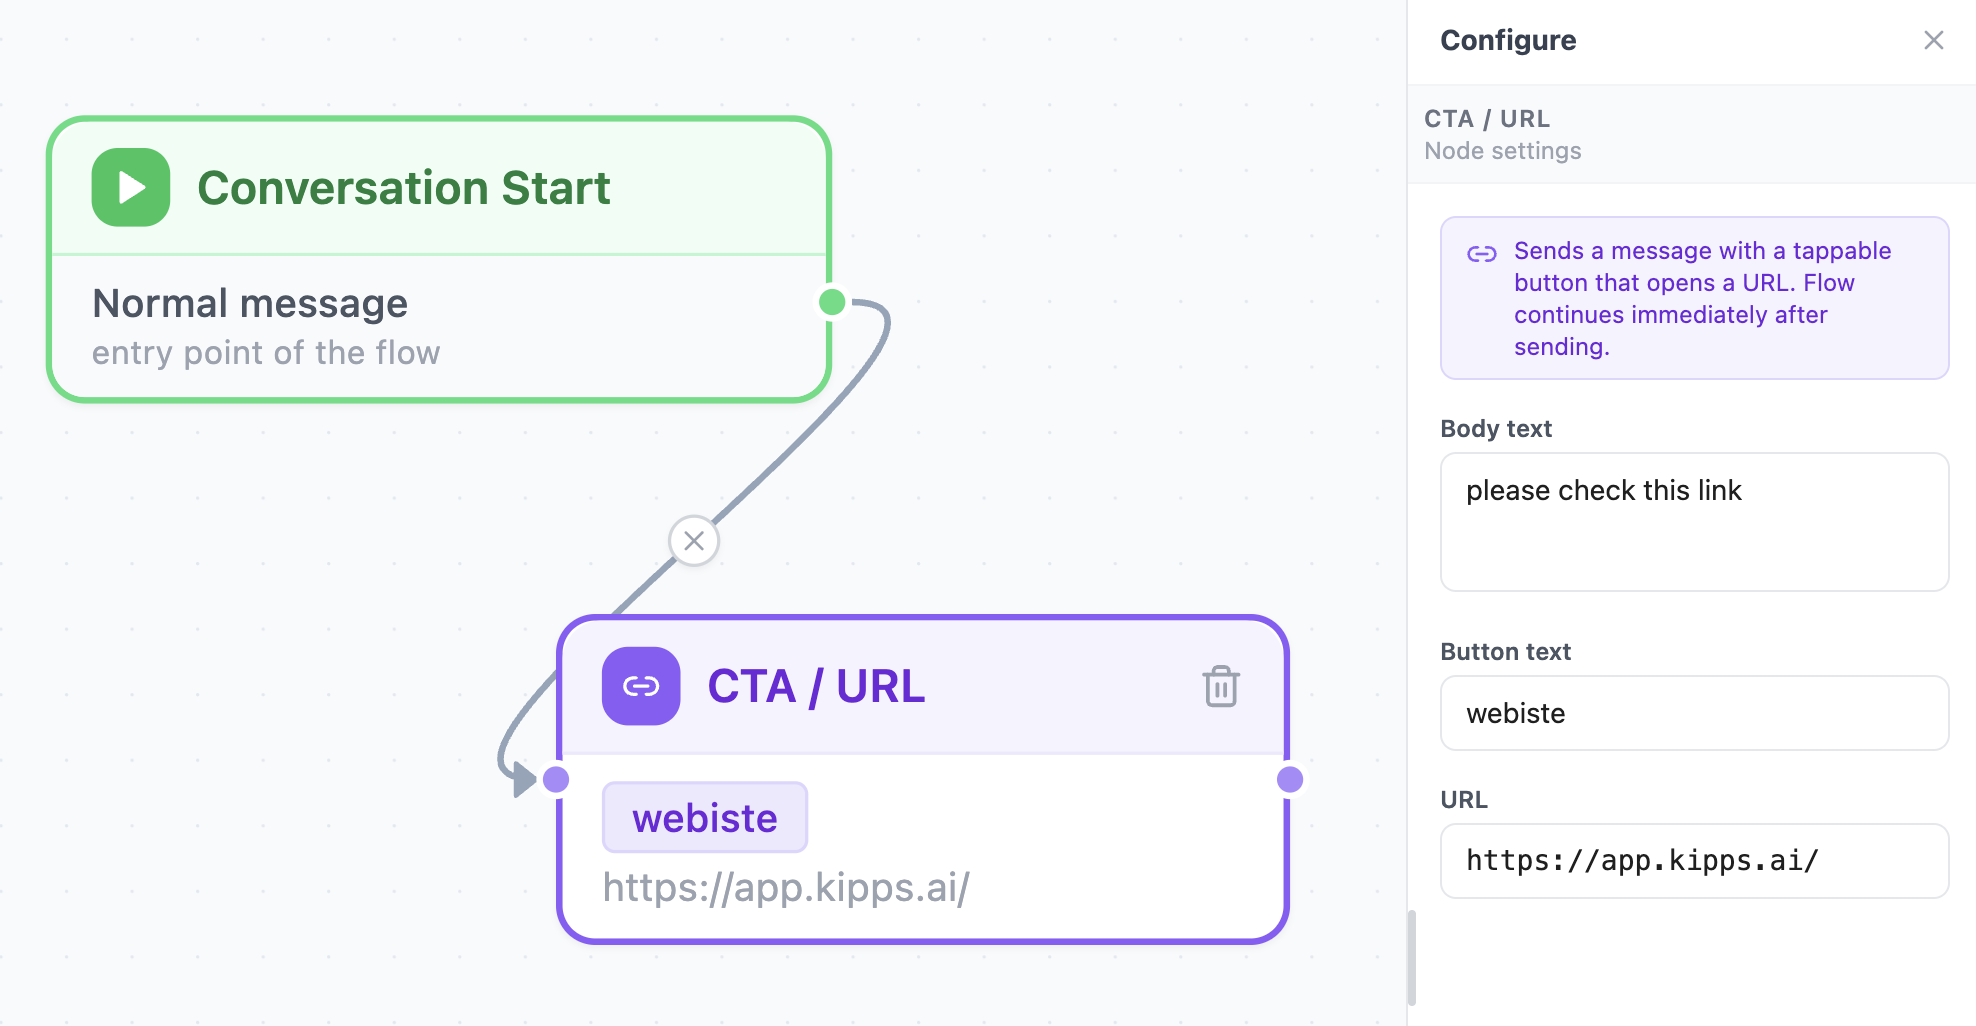
Sends a message with one tappable button that opens a web link. CTA stands for "call to action".
When to use it
- Sending a payment link after a customer confirms an order
- Linking to a booking page, a product page or your website
- Sharing a Google Maps location link
- Sending a sign-up or download link
How to set it up
- Drag CTA / URL onto the canvas and connect it.
- Write the Body text: the message shown above the button.
- Write the Button text: the label on the button, such as "Pay now".
- Paste the URL the button should open. It must start with
http://orhttps://.
Settings
| Setting | What to enter | Limit |
|---|---|---|
| Body text | The message above the button | 1,024 characters |
| Button text | The label on the button | 20 characters |
| URL | The link to open. You can use variables, for example https://shop.com/order/{{order_id}} | Must start with http:// or https:// |
Works well with
| Place it... | Use this node | Why |
|---|---|---|
| After | Reply Buttons | The customer picks "Book a demo", and you send the booking link |
| After | API / Webhook | Create a payment link through your system, then send it with a variable |
| After | Condition | Send different links to different customers |
| Before | Text Message | Follow up: "Let us know once you've paid." |
Tips
- WhatsApp allows only one link button per message. For two links, use two CTA nodes.
- The flow continues right after sending. It does not wait to see whether the customer tapped the button.
- Use a short, action-led label such as "Book now" or "View menu".
Media
What it does
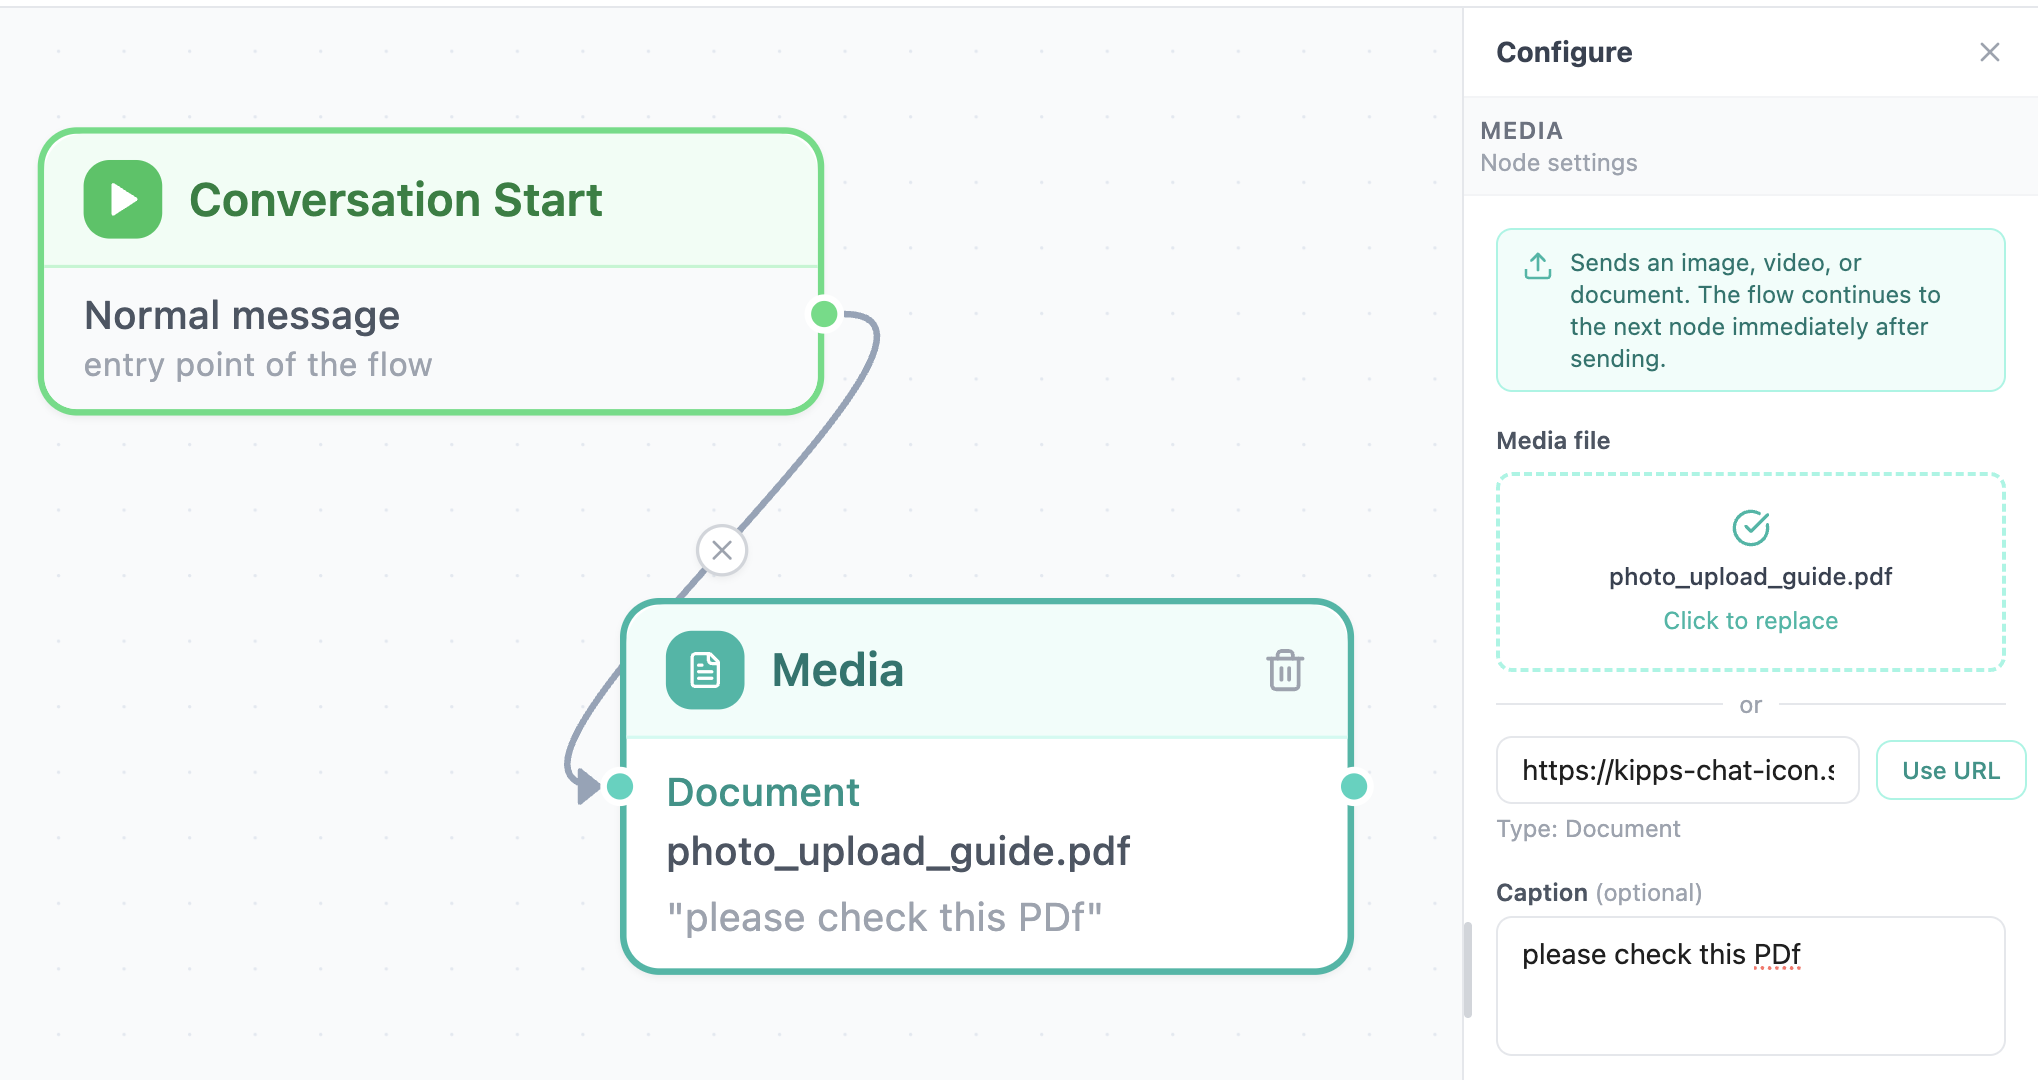
Sends an image, video or document (such as a PDF) with an optional caption.
When to use it
- Sending a brochure, price list or catalog as a PDF
- Sharing a product photo or demo video
- Sending an invoice, ticket or confirmation document
- Showing a welcome banner at the start of a chat
How to set it up
- Drag Media onto the canvas and connect it.
- Add your file in one of two ways:
- Upload: click the upload box and choose an image, video or document from your computer.
- Use a link: paste a direct link to the file and click Use URL.
- Optionally add a Caption. It appears under the file.
Kipps works out whether the file is an image, video or document automatically. You will see the detected type under the upload box.
Settings
| Setting | What to enter |
|---|---|
| Media file | Upload a file or paste a direct URL. Supported: images, videos, PDF, Word, Excel and PowerPoint files. |
| Caption (optional) | A short line shown under the file. You can use variables like {{name}}. |
Works well with
| Place it... | Use this node | Why |
|---|---|---|
| After | Reply Buttons or List / Menu | The customer picks a product, and you send its brochure |
| After | Text Message | Introduce the file: "Here is our latest menu 👇" |
| Before | Text Message or Reply Buttons | Ask what they think: "Would you like to book a visit?" |
| After | Condition | Send a different file depending on the customer's answer |
Tips
- If a media node has no file, it is skipped, so double-check that every node shows a file name.
- A link must point directly to the file, not to a web page that contains the file.
- Large videos take longer to deliver. Keep files small when you can.
Template
What it does
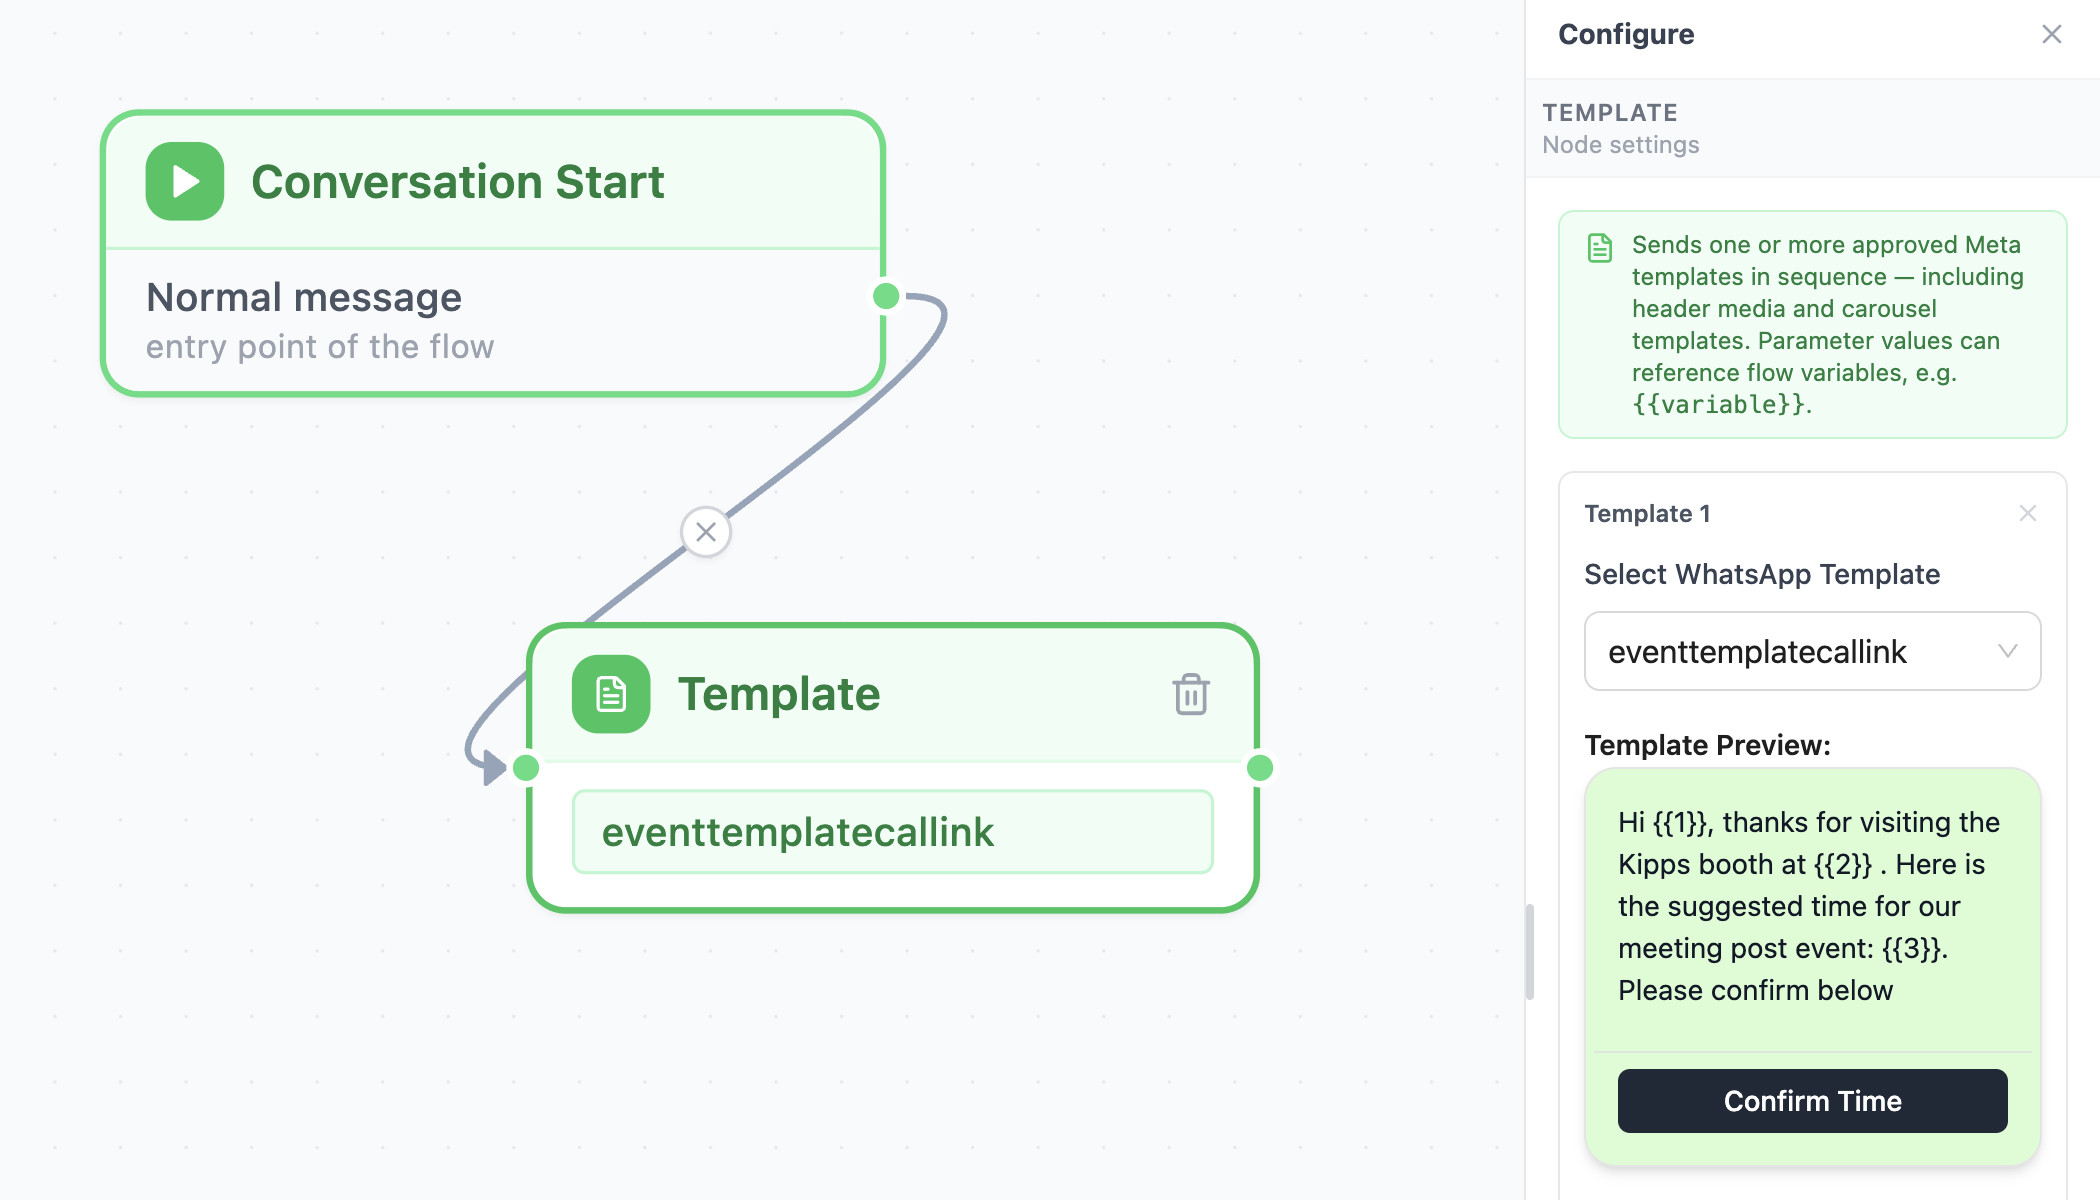
Sends one or more approved WhatsApp message templates. A template is a message format that WhatsApp has reviewed and approved in advance.
Why templates matter
WhatsApp only lets a business send free-form messages for 24 hours after the customer last wrote. After that window, or when you want to start a chat, you must use an approved template. The Template node is how you do that inside a flow.
When to use it
- Sending order confirmations, delivery updates and reminders
- Re-engaging customers after 24 hours of silence
- Sending offers and announcements that include images or buttons
- Sending a carousel of products
How to set it up
- Drag Template onto the canvas and connect it.
- Click Add template and pick one from your approved templates.
- Fill in the template's variable fields. You can type your own text or use flow variables such as
{{name}}. - If the template has a header image, video or document, make sure that field has a link.
- Want to send more than one template? Click Add template again. They are sent in order.
Settings
| Setting | What to enter |
|---|---|
| Template | An approved template from your WhatsApp account |
| Template variables | The values for the placeholders in the template. Flow variables like {{name}} work here. |
| Header media | A link, when the template needs an image, video or document in its header |
Works well with
| Place it... | Use this node | Why |
|---|---|---|
| After | API / Webhook | Fetch order details from your system, then send a template that includes them |
| After | Delay / Nudge | Wait a while, then send a reminder template |
| After | Text Input or Form | Collect a name or order number first, then use it inside the template |
| Before | End Chat | Send a final confirmation, then close |
Tips
- Only approved templates appear in the list. Create and submit new ones from your WhatsApp templates page.
- The flow moves on immediately after sending. It does not wait for the customer to tap a template button.
- Template buttons can also start a flow. This is set in the Start node.
WhatsApp Flow
What it does
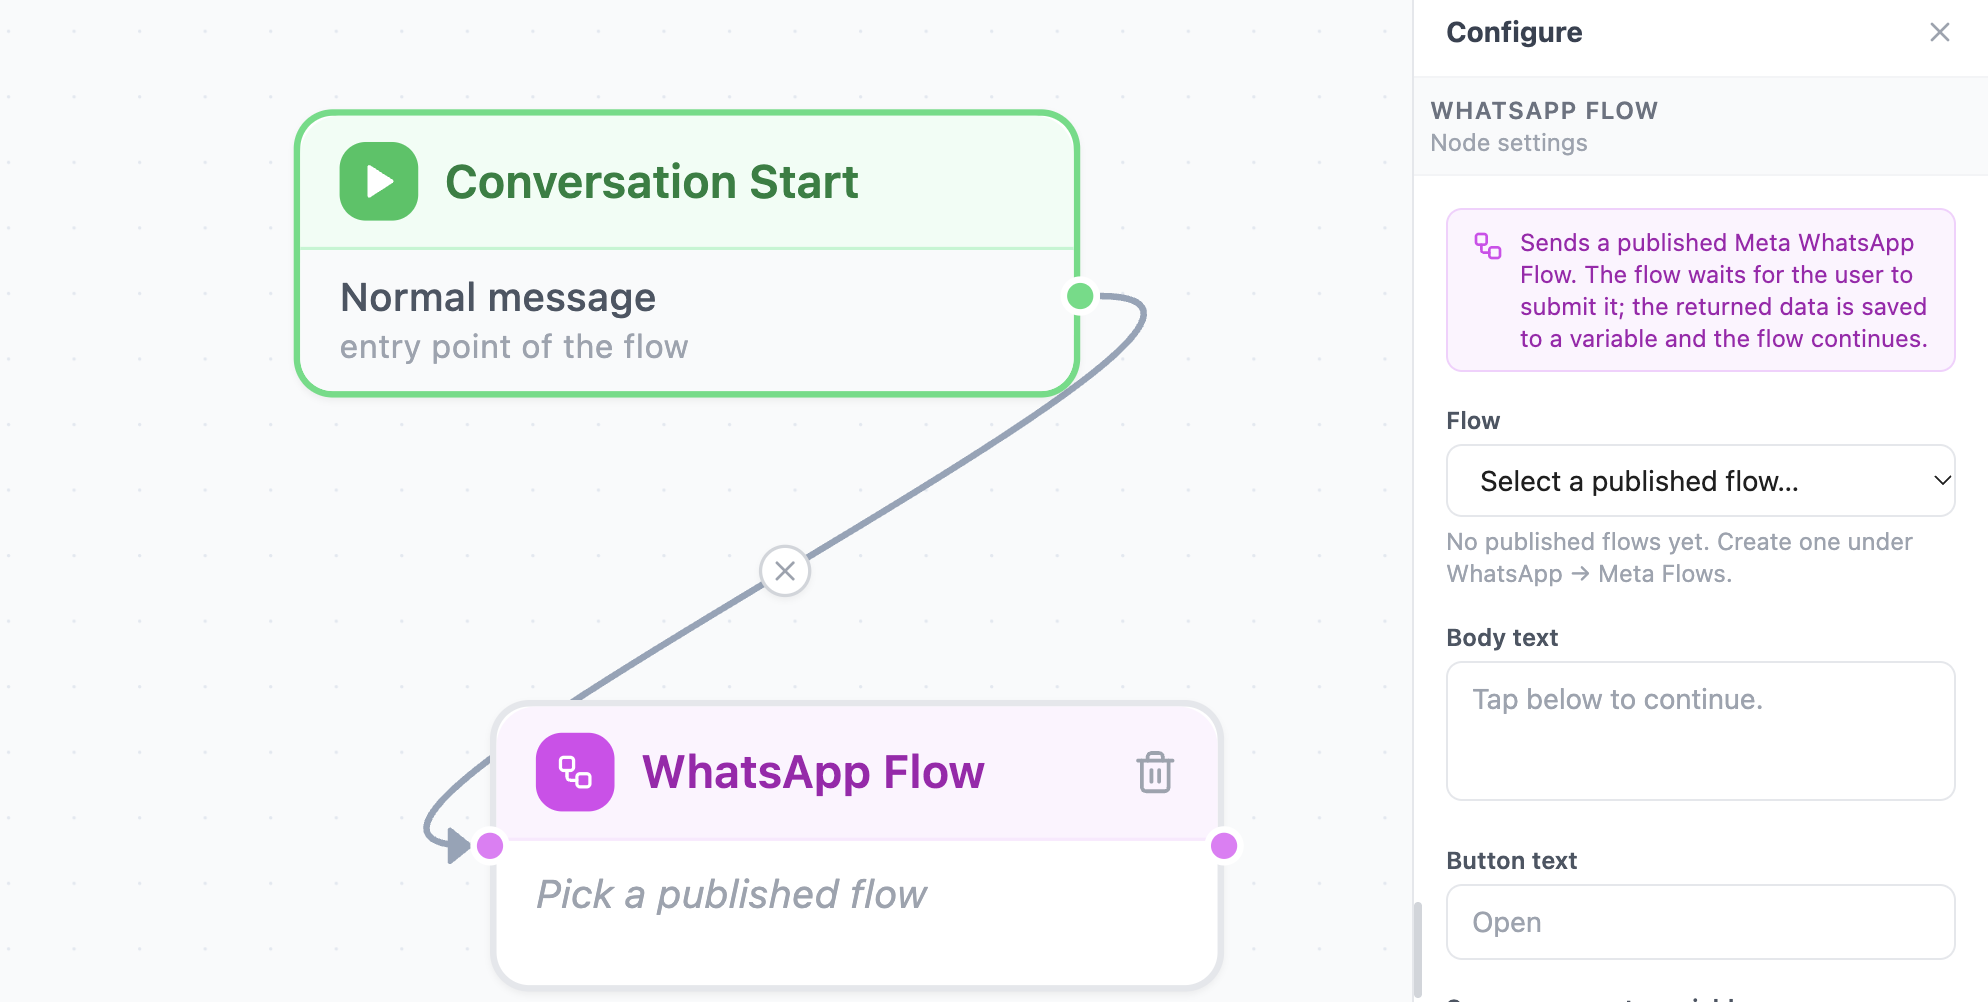
Opens a native form inside WhatsApp, built with Meta's own Flow builder. The customer taps a button, fills in the screens, and submits. Kipps then saves the answers and continues the flow.
This node is different from the rest of this page. Unlike the other message nodes, it waits for the customer to finish the form before moving on.
When to use it
- A booking form with date, time and service
- A lead form with name, email, city and budget
- A feedback survey with ratings
- Anything that needs several answers at once, so the chat does not feel like twenty questions
How to set it up
- In your WhatsApp account, create and publish a WhatsApp Flow under Meta Flows. Only published flows can be sent.
- Drag the WhatsApp Flow node onto the canvas and connect it.
- Pick your published flow from the Flow drop-down.
- Write the Body text: the message shown above the button.
- Write the Button text: for example "Book now". It can be up to 20 characters.
- Choose a name in Save response to variable. The default is
flow_response. - Optionally set Auto-continue if no reply.
Settings
| Setting | What to enter |
|---|---|
| Flow | A published flow from your account |
| Body text | The message shown above the button |
| Button text | The label that opens the form (20 characters) |
| Save response to variable | Where the whole submission is stored. Default: flow_response |
| Auto-continue if no reply | Minutes to wait before the flow moves on without an answer. Leave blank to wait indefinitely. |
What happens to the answers?
- The full submission is saved in the variable you chose.
- Each simple field (text, number, yes/no) is also saved as its own variable, so you can use it straight away. If the form has a field called
email, you can write{{email}}in the next message. - The answers are also saved on the contact, so you can see and reuse them in Contacts and campaigns.
Works well with
| Place it... | Use this node | Why |
|---|---|---|
| After | Reply Buttons | The customer taps "Book a visit", and the form opens |
| After | Text Message | Confirm the details: "Thanks {{name}}, we've got your booking." |
| After | Condition | Branch on an answer, for example send high budgets to a human |
| After | API / Webhook | Send the submitted form to your CRM or booking system |
| After | Human Handoff | Pass the filled form to your team |
Tips
- If the customer sends a normal message instead of opening the form, Kipps sends the form again so they are not stuck.
- Use Auto-continue if no reply and a follow-up path to remind customers who do not finish.
- Keep forms short: two or three screens get the highest completion.
Example: a small lead-capture flow
Here is how the message nodes can come together.
- Conversation Start
- Text Message: "Hi
{{name}}, thanks for contacting Sunrise Dental 👋" - Media: sends the price list PDF with the caption "Our treatment prices"
- Reply Buttons: "Would you like to book a visit?" with Yes and Not now
- On Yes, WhatsApp Flow opens the booking form
- Text Message: "Thanks
{{name}}, we'll confirm your slot shortly." - CTA / URL: "Get directions" opens your Google Maps link
- On Not now, Text Message: "No problem, we're here whenever you're ready."
- End Chat
Quick reference: choosing the right node
| I want to... | Use |
|---|---|
| Send a simple message | Text Message |
| Send a link that opens on a button | CTA / URL |
| Send a PDF, photo or video | Media |
| Message someone outside the 24-hour window, or send a pre-approved message | Template |
| Collect several answers in one go | WhatsApp Flow |
| Ask a question and wait for the answer | An Ask & Collect node |
Common mistakes to avoid
- Expecting a Text Message to wait for an answer. It sends and moves on. Add an Ask & Collect node after it.
- Using a link to a web page in a Media node. It must be a direct link to the file.
- A button label longer than 20 characters. The builder will warn you, and WhatsApp will refuse it.
- Using a template that has not been approved. It will not appear in the list until WhatsApp approves it.
- A node with nothing connected after it. The flow stops there. Connect it to the next step or to End Chat.
Next steps
- Go back to the WhatsApp Flow Agent overview
- More node sections (Ask & Collect and Logic & Flow) are coming soon
Related Articles