Create Campaign for Meta Ad Leads
Learn how to create a campaign using Meta (Facebook) Lead Generation Ads as your audience source with automated lead sync and voicebot integration.
This guide explains how to create a campaign using Meta (Facebook) Lead Generation Ads as your audience source. This integration allows you to automatically capture leads from your Meta ads and engage them through your campaign workflows.
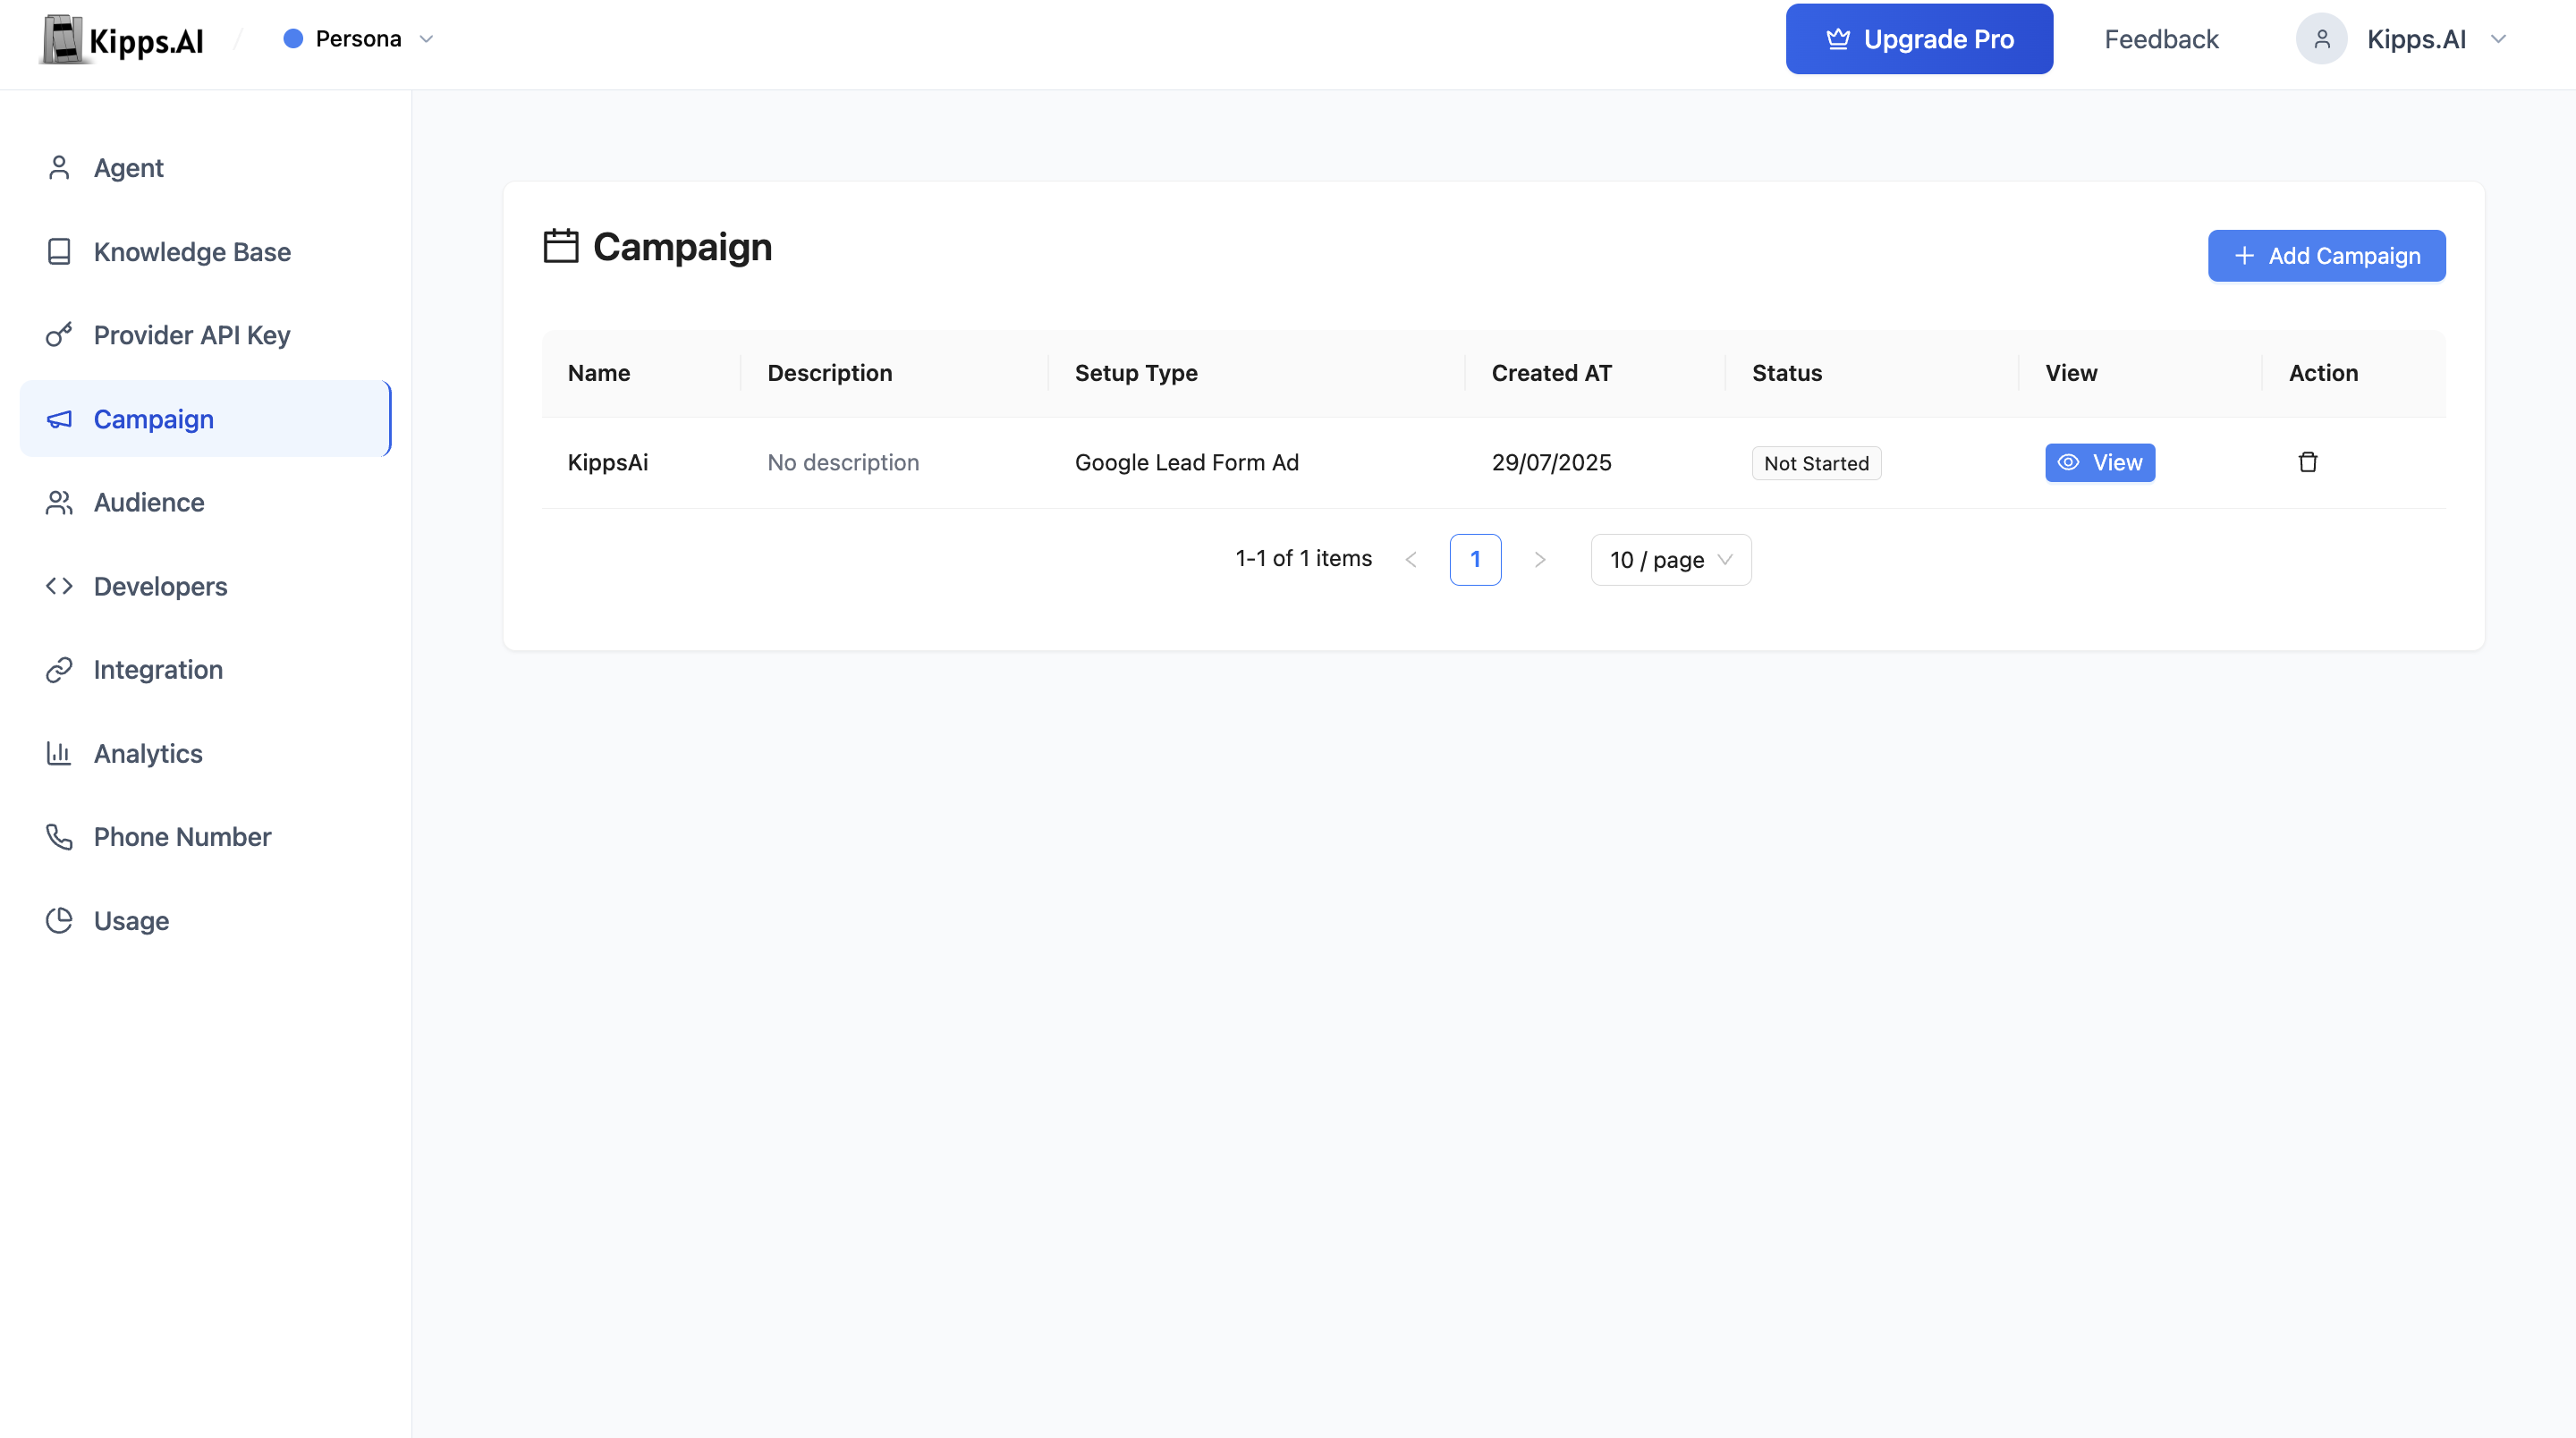
1. Integrate Meta Lead Generation
- Go to the Integrations page from the main dashboard.
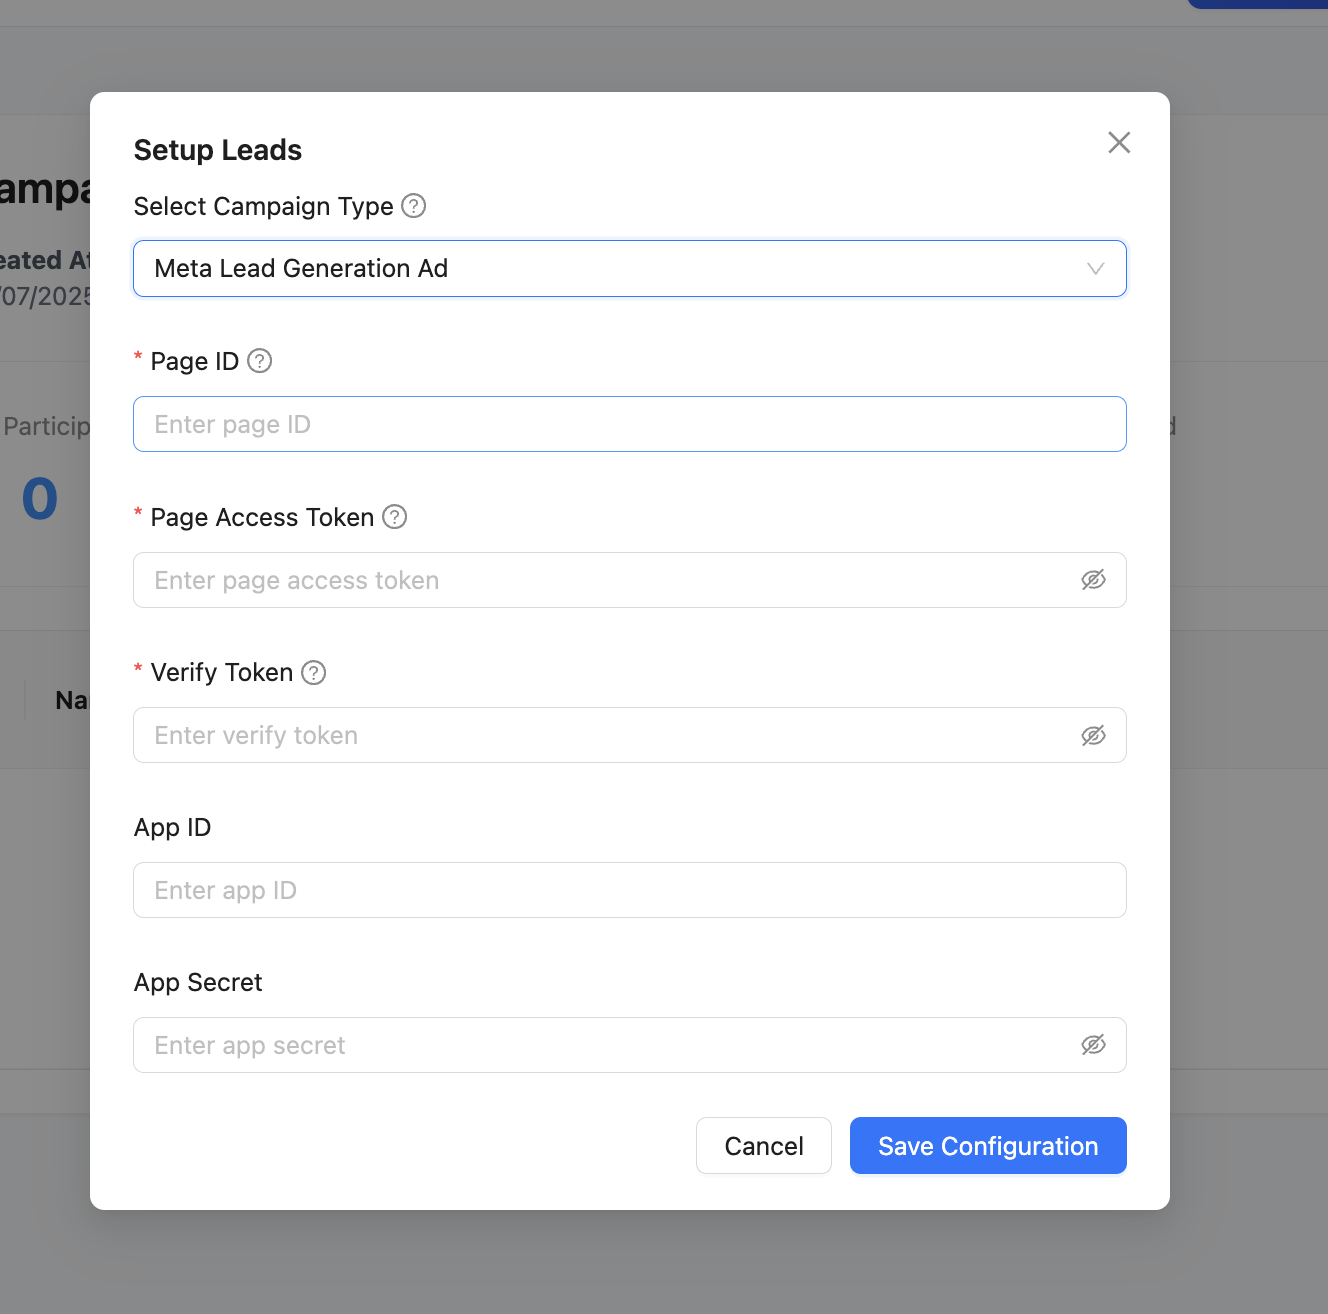
- Click the Meta Lead Generation Ad option or card.
- Fill in the required Meta configuration:
- Page ID: Your Facebook page ID.
- Page Access Token: Generated from Facebook Graph API Explorer with the required permissions.
- Verify Token: A custom string for webhook verification.
- (Optional) App ID and App Secret for advanced configurations.
- Copy the Webhook URL provided after setup.
- Add this Webhook URL and Verify Token to your Meta developer account for the relevant page/app.
- Save the configuration.
2. Start Creating a Campaign
- Go to the Campaign tab.
- Click Add Campaign or + Create Campaign.
3. Fill Campaign Details
- Campaign Name: Enter a descriptive name.
- Description: Add details about the campaign’s purpose.
- Duration: Set how many days the campaign should run.
4. Select Setup Type as Meta Lead Generation Ad
- In the Setup Type or Audience Source field, select Meta Lead Generation Ad from the dropdown.
- This tells the system to use your Meta ad leads as the campaign audience.
5. Configure Campaign Settings
- Select Voice Agent: Choose the AI voicebot that will make the calls (for voice campaigns).
- Initial Message: Set the opening message the bot will deliver.
- System Prompt (Optional): Provide instructions for the bot’s behavior.
- Lead Qualification Prompt: Define how the bot should qualify leads.
- Lead Qualification Params: Add any custom fields you want to collect or qualify (e.g., "Interested", "Budget", etc.).
6. Review and Launch
- Review all settings.
- Click Create to save the campaign.
- Once setup is complete, start the campaign from the campaign list.
Features
- Automatic Lead Capture: Leads from your Meta ads are automatically fetched and used as the campaign audience.
- Webhook Integration: Real-time syncing of new leads via Meta’s webhook.
- No Manual Uploads: No need to upload CSVs; your ad data stays in sync.
- AI Voicebot Integration: Use advanced voice agents for automated, natural conversations.
- Custom Prompts: Personalize the initial message and qualification logic.
- Lead Qualification: Automatically tag and qualify leads based on responses.
- Analytics: Track delivery, response, and conversion rates in real time.
- Downloadable Reports: Export leads and campaign results as CSV.
- Status Tracking: Monitor campaign progress (Not Started, On Going, Completed).
Monitoring and Managing Campaigns
View Campaign Status and Analytics
- See detailed statistics: total participants, contacted, replied, failed, and conversion rates.
Download Lead Data and Call Transcripts
- Export results for further analysis.
Drill Down into Each Lead
- View call status, responses, and qualification details.
Tip:
You can revisit the Meta Lead Generation Ad integration at any time to update your webhook or verify token, or to troubleshoot lead syncing.
Troubleshooting
New leads from Meta ads are not appearing in the campaign. Verify the Webhook URL from Kipps.AI has been correctly added to your Meta developer app under the WhatsApp or Lead Ads product webhook settings. Also confirm the Verify Token entered in Meta exactly matches the one shown in Kipps.AI—a mismatch will prevent Meta from validating the webhook.
The campaign shows 0 contacted even after starting. Check that the campaign's Voice Agent has a phone number linked and that inbound/outbound SIP is enabled. Also confirm the campaign is in "On Going" status and has not hit its configured duration limit.
Meta approved the lead form ad but no leads are syncing. Ensure your lead form is set up as a "Lead Generation" form type (not a "More Volume" or other variant that doesn't support webhook delivery). Also confirm the form is associated with the same Facebook Page ID entered in the Kipps.AI integration.
Frequently Asked Questions
Can I use the same Meta integration for multiple campaigns? Yes. Once the Meta Lead Generation Ad integration is set up, you can select it as the audience source for as many campaigns as you need without re-configuring the webhook.
How quickly do new Meta ad leads trigger the campaign? Meta sends webhook notifications in near real-time—typically within a few seconds of a lead submitting the form. Kipps.AI processes the webhook and queues the outreach call immediately.
Can I filter which leads from Meta enter the campaign? Currently, all leads captured via the connected Meta form are included as campaign participants. For more advanced filtering, export lead data to a CSV and use the CSV audience source type to control which specific leads are contacted.
What happens if a lead submits the form multiple times? Duplicate leads are identified by phone number. If the same number is already in the campaign, the duplicate submission is typically ignored. Check your campaign settings for deduplication options.
Does this integration work for Instagram Lead Ads as well? Meta Lead Generation Ads include both Facebook and Instagram placements. If your lead form is served on Instagram as part of a Meta campaign, leads captured there will also be synced through the same webhook.
Related Articles