API / Webhook Trigger Node
Trigger a Workflow Campaign from your website form, CRM, or any external automation using the API / Webhook trigger node.
The API / Webhook Trigger node lets you start a campaign for a lead directly from your own systems — a website form, a CRM, an ad platform, or any other automation — by calling a dedicated URL with the lead's details.
Use this node whenever you want leads to enter the workflow the moment they're captured somewhere outside of Kipps.AI.
How It Works
- The node fires immediately on every request — there is no polling delay.
- On each request, Kipps first creates or updates a contact by matching the
phonenumber, then proceeds through the rest of the workflow for that lead. - The trigger only fires while the campaign is started. Requests sent while the campaign is paused do not enter the workflow.
1. Add the Trigger Node
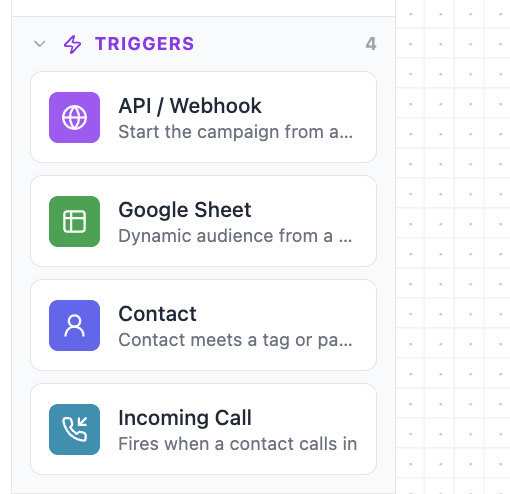
On the workflow canvas, open the Triggers group in the left NODES sidebar and drag the API / Webhook node onto the canvas.
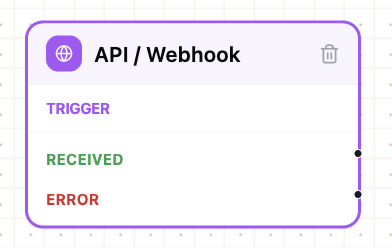
The node appears on the canvas with three connection points — Trigger, Received, and Error.
2. Configure the Node
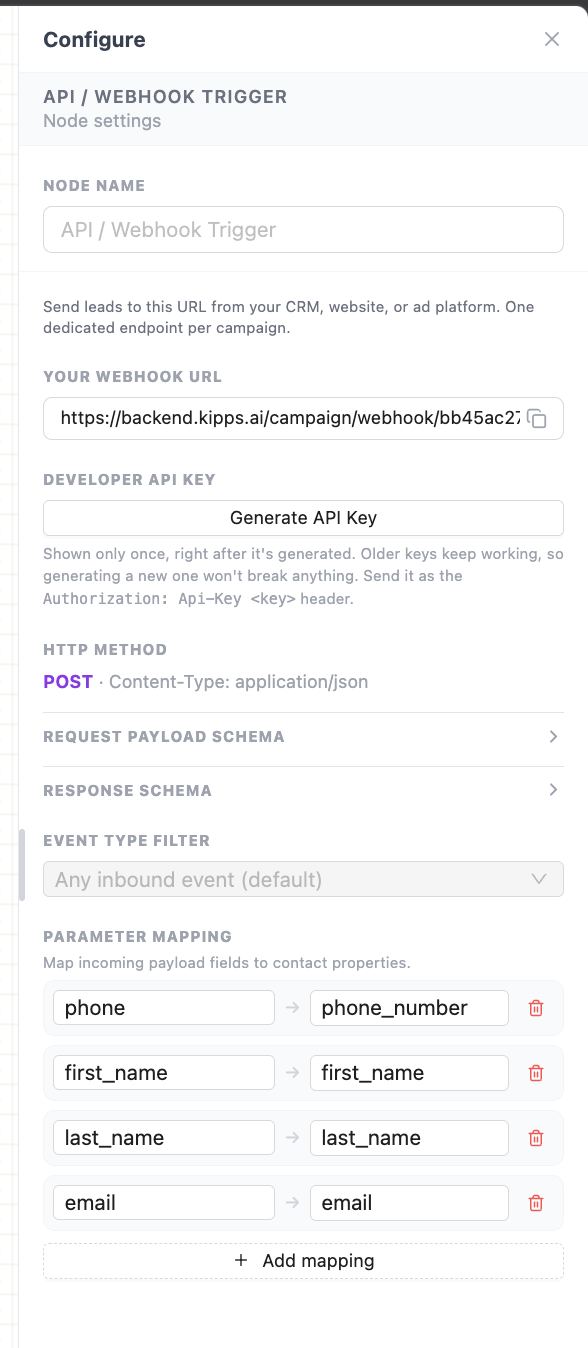
Double-click the node on the canvas to open the Configure drawer on the right. All of the node's settings are set up from here.
3. Name the Node
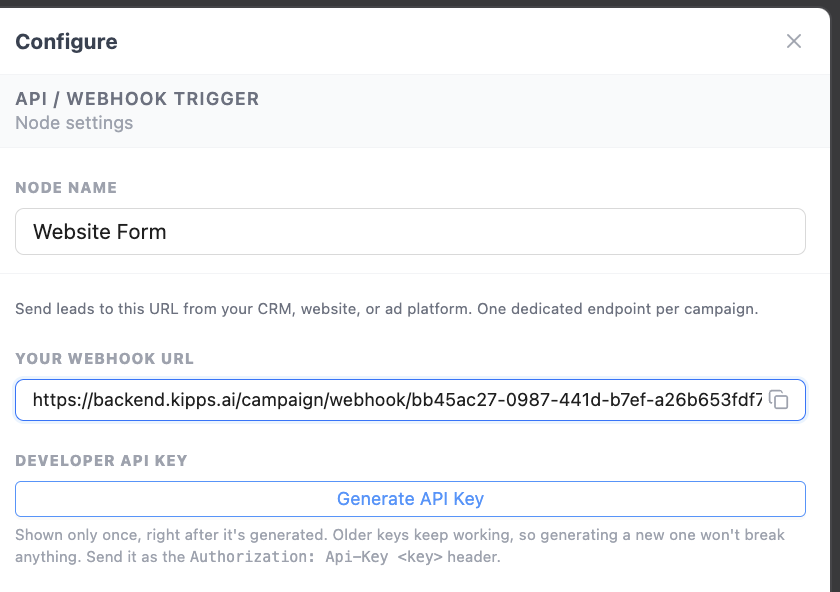
Give the node a clear Node Name — ideally the name of the source that will be calling it, such as "Website Form" or "Facebook Ads". As your workflow grows, these names help you read the flow like a story and quickly understand what each node is doing.
4. Copy the Webhook URL
Copy the Your Webhook URL value. This is the endpoint you'll call from your side (website, CRM, or automation tool) whenever a new lead comes in. Each API / Webhook node gets its own dedicated URL.
5. Generate a Developer API Key
Click Generate API Key to create a key for authenticating your requests. You can also reuse any existing Kipps developer API key instead of generating a new one.
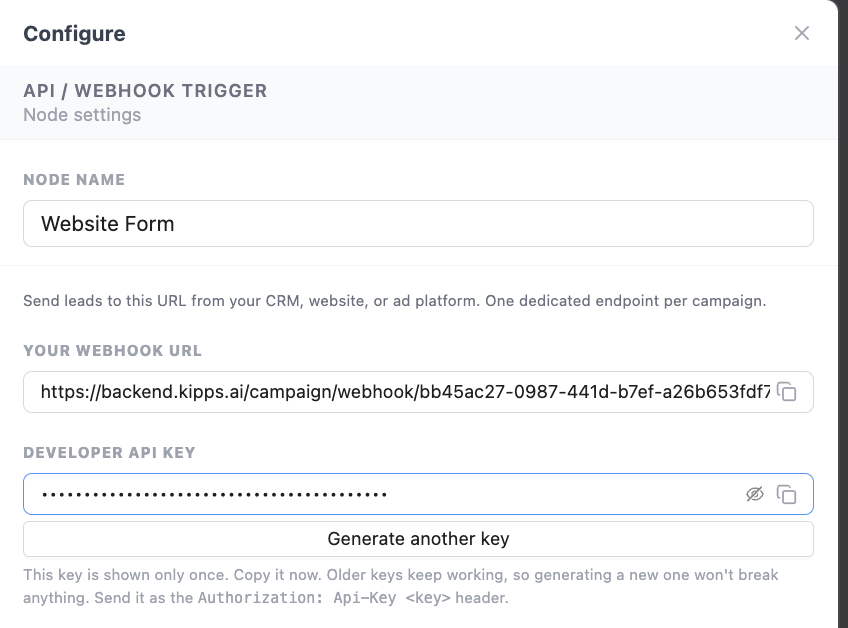
Important: the key is shown in full only once, right after it's generated. Copy it immediately — if you lose it, you'll need to generate a new one. Older keys keep working, so generating a new key never breaks an existing integration.
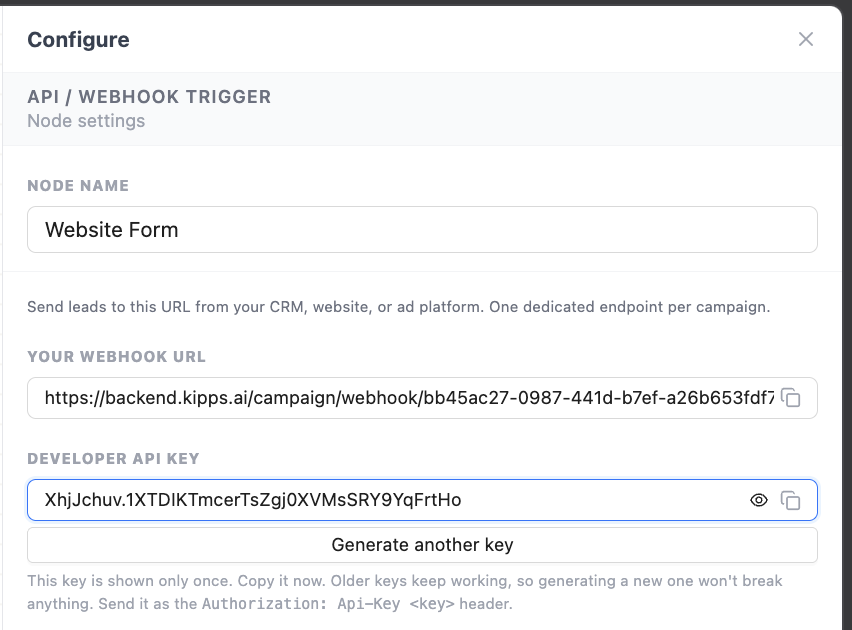
Pass this key on every request as the Authorization header:
Authorization: Api-Key <key>
6. Request Payload Schema
Requests must be sent as POST with Content-Type: application/json. The panel shows the expected request payload:
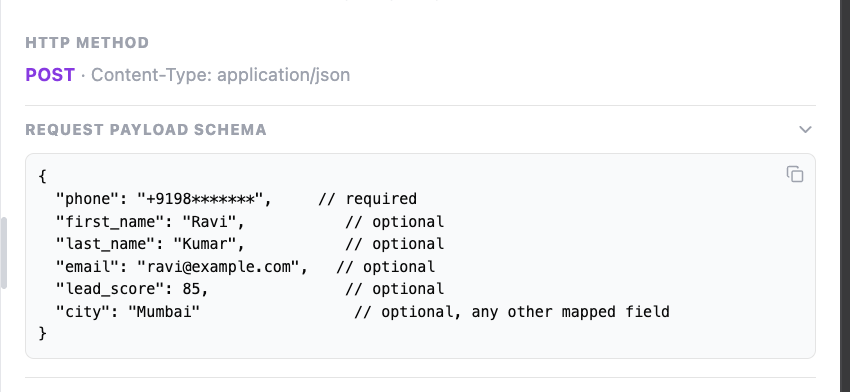
{
  "phone": "+9198*******",     // required
  "first_name": "Ravi",         // optional
  "last_name": "Kumar",         // optional
  "email": "ravi@example.com",  // optional
  "lead_score": 85,             // optional
  "city": "Mumbai"              // optional, any other mapped field
}
phoneis the only required field.- Every other field is optional, including any custom field you've set up through Parameter Mapping.
You can also expand the Response Schema section in the same panel to see the shape of the response returned for each call.
When this node is triggered, Kipps combines these parameters to create a new contact. If a contact with the same phone number already exists, Kipps updates the other fields on that existing contact instead of creating a duplicate.
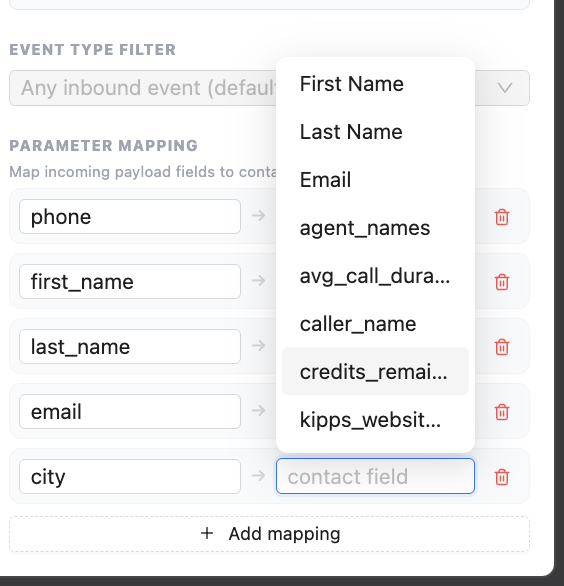
7. Map Additional Fields
By default, common fields like name and email are mapped for you. Use Add mapping to connect any other field from your request payload to a field on the contact.
On the left, enter the key exactly as it appears in your request payload. On the right, select the matching contact field.
To learn more about how contact fields work and how bulk data maps onto them, see Contacts Bulk Upload.
8. What to Connect Next
Once the trigger is configured, connect its Received output to an action node so the workflow actually does something with the lead:
- Phone Call (Outbound) — place an AI voice call to the lead.
- WhatsApp Template (Outbound) — send the lead a templated WhatsApp message.
If you need to route leads differently depending on the incoming data — for example, calling only leads above a certain lead score, or sending a WhatsApp message for one city and a phone call for another — add a node from the Logic & Data group between the trigger and your outbound nodes to branch the flow before it reaches those actions.
The node also has an Error output for when the trigger fails to process the incoming request. Connect this to a Webhook node (or any node that calls out to your own API) to notify your own systems when a lead fails to come through, so you can log the failure or retry it from your side.
Frequently Asked Questions
1. How quickly does a request start the workflow?
Immediately. Unlike the Google Sheet trigger, there is no polling — the workflow starts for that lead as soon as the request is received.
2. Does this node create a new contact every time it's called?
Not necessarily.
- Kipps matches on phone number first.
- No existing contact with that number → a new contact is created.
- A contact with that number already exists → its other fields are updated instead of creating a duplicate.
3. Will requests still work while the campaign is paused?
No. This trigger — like all trigger nodes — only runs while the campaign is started. Requests sent while the campaign is paused will not start the workflow for that lead. Resume the campaign before resuming any integration that calls this webhook.
4. What happens if I send a request without a phone field?
The request fails, since phone is the only required field and is what Kipps uses to create or match the contact. Route the node's Error output to a Webhook node or your own API so you can catch and log requests like this.
Related Articles