Create Campaign Using Google Sheet Audience
Learn how to create a WhatsApp campaign using contacts synced directly from your Google Sheet, with automatic column mapping, template selection, and delivery tracking.
This guide explains how to use Google Sheet as the audience source for your WhatsApp campaigns.
You can fetch contacts directly from any connected Google spreadsheet, select the sheet tab, and map the phone/name columns — no manual CSV upload required.
Before You Start (Checklist)
Make sure you have these ready before creating your campaign:
- WhatsApp agent connected: Your WhatsApp Agent should be active and have a selected WhatsApp number.
- Approved WhatsApp templates: At least one WhatsApp template approved in your WhatsApp Business account.
- Google integration: Google Sheets integration connected (you will be prompted to log in if it’s not).
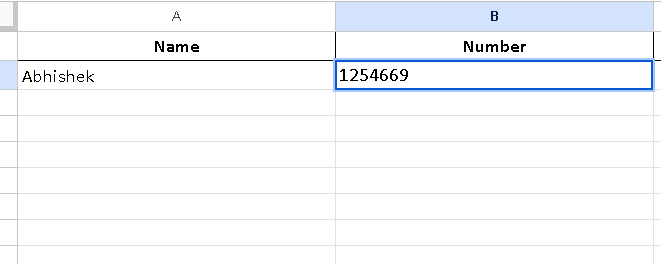
- Clean sheet structure:
- A header row (column titles) in the first row
- A phone number column (required)
- Optional name column and any other fields you may want to use as template parameters
If your Google Sheet has no headers, you won’t be able to map fields and the configuration cannot be saved.
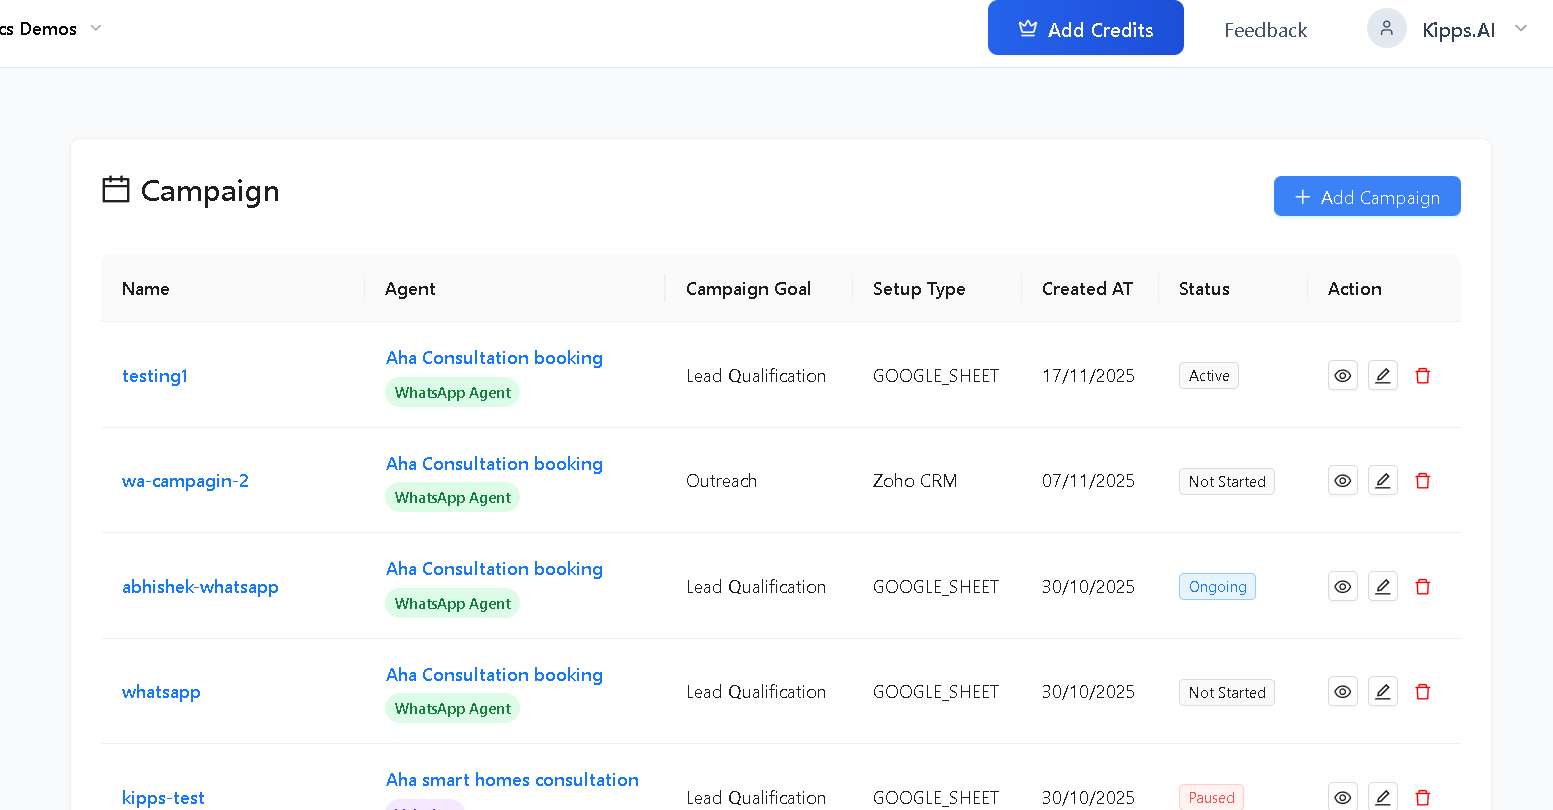
1. Open the Campaigns Page
- Navigate to the Campaign section from the dashboard.
- You’ll see your campaign list page with an Add Campaign button.
2. Create a Campaign
On the campaign list page:
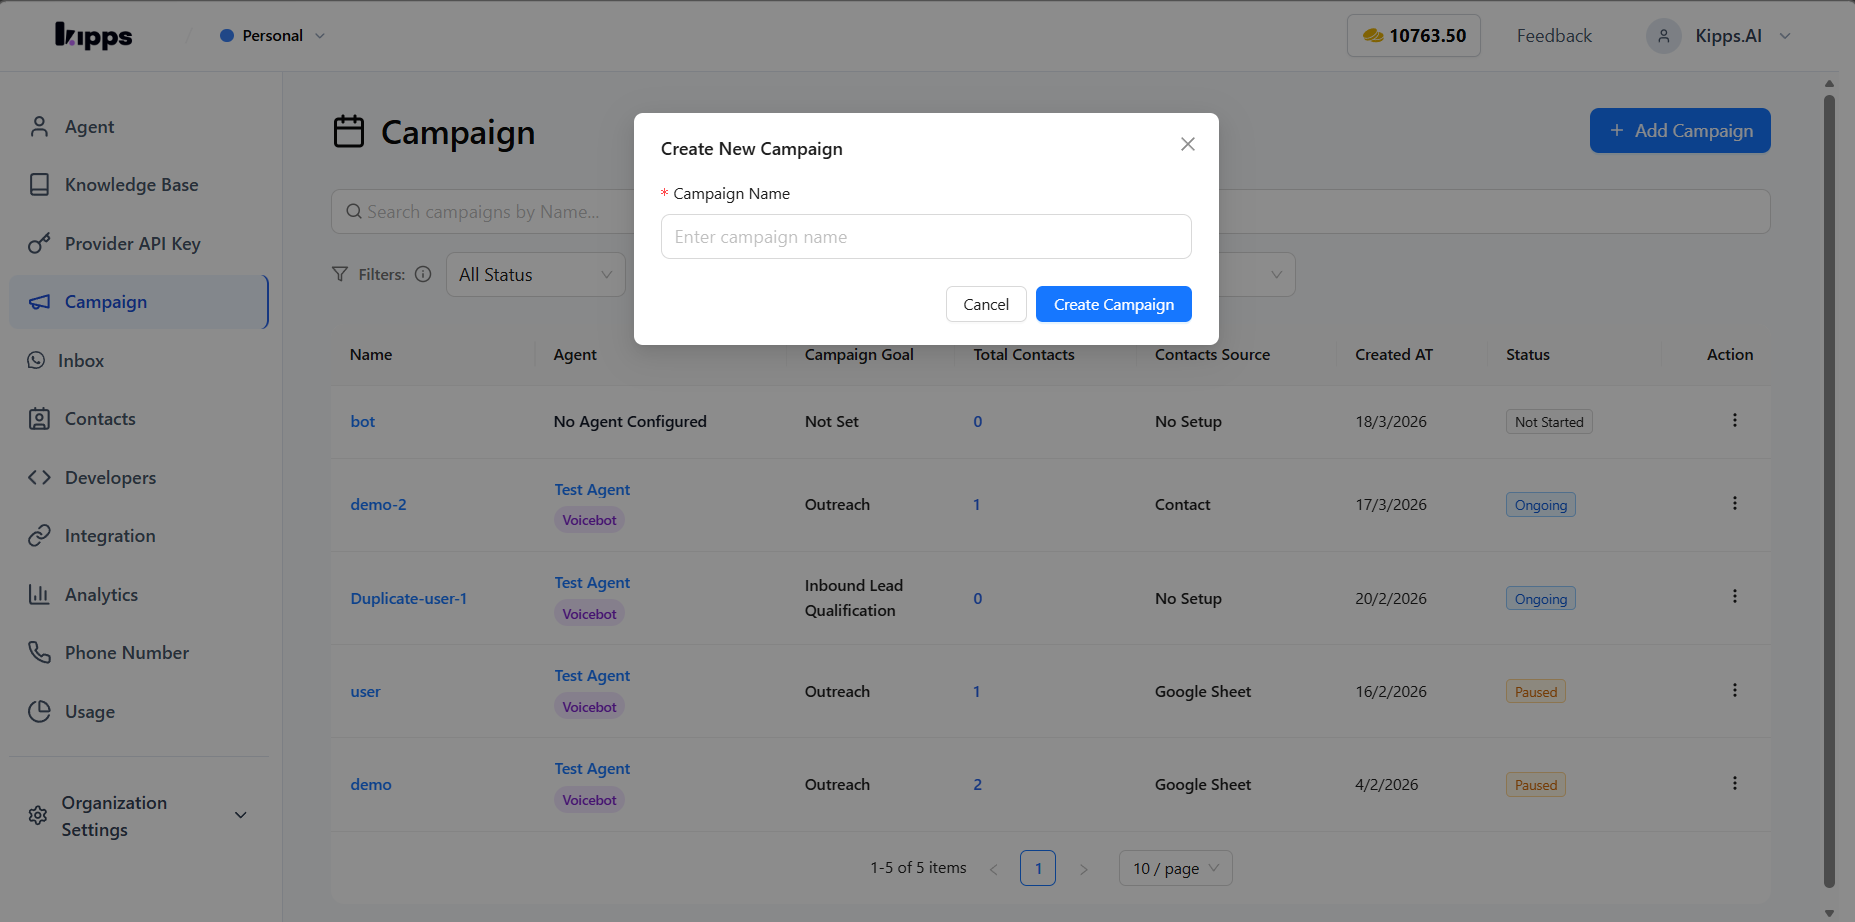
- Click Add Campaign.
- A modal opens. Enter a Campaign Name.
- Use a clear name you can recognize later (example:
MarchOutreach-GoogleSheet).
- Use a clear name you can recognize later (example:
- Confirm to create the campaign.
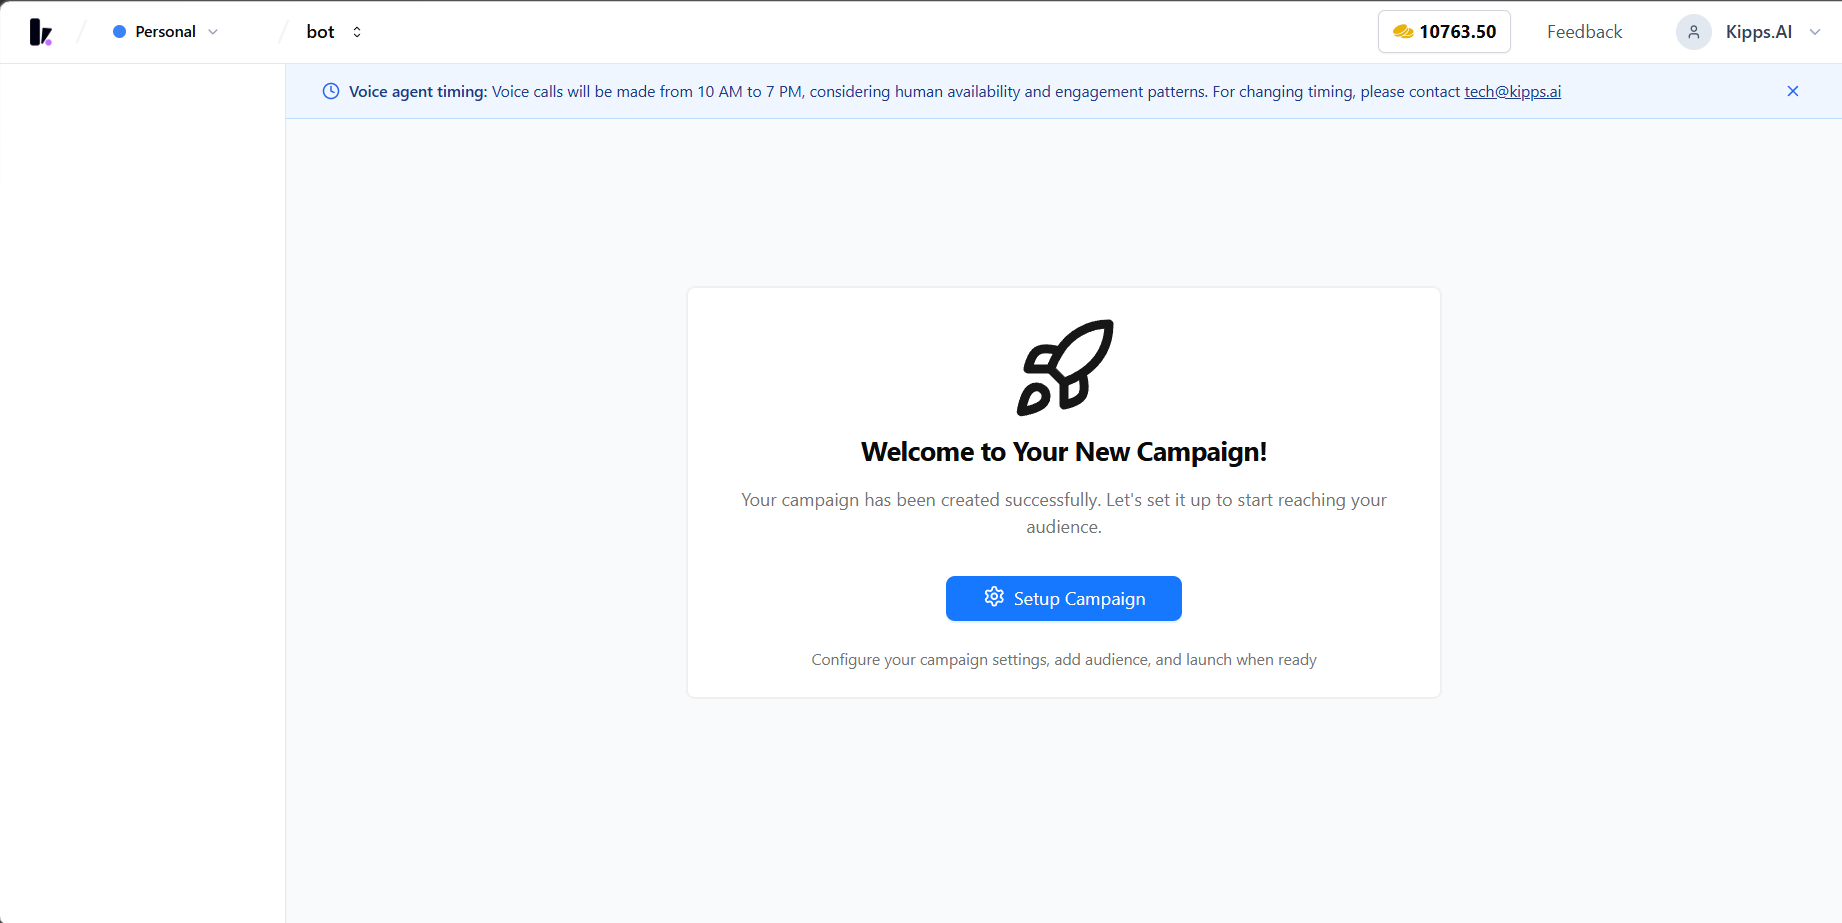
After the campaign is created, the app opens the campaign details / setup page for that campaign.
Naming tips
- Use a consistent prefix like
Outreach,Birthday, orAnniversary. - Include the audience source in the name (example:
Google Sheet) when you run multiple sources. - Avoid very short names; descriptive names help later when duplicating/archiving campaigns.
3. Setup the Campaign (Setup Campaign → Wizard)
After creation, you will see a Setup Campaign button.
- Click Setup Campaign.
- A Campaign Setup modal opens with a 2-step wizard:
- Step 1: Campaign Type
- Step 2: Agent & Template
3.1 Step 1 — Select Campaign Type (WhatsApp: Outreach or Birthday/Anniversary)
For WhatsApp campaigns, you’ll typically use:
- Outreach: general outreach campaigns (most common)
- Birthday/Anniversary: sends messages based on a configured date field
Select one and click Next.
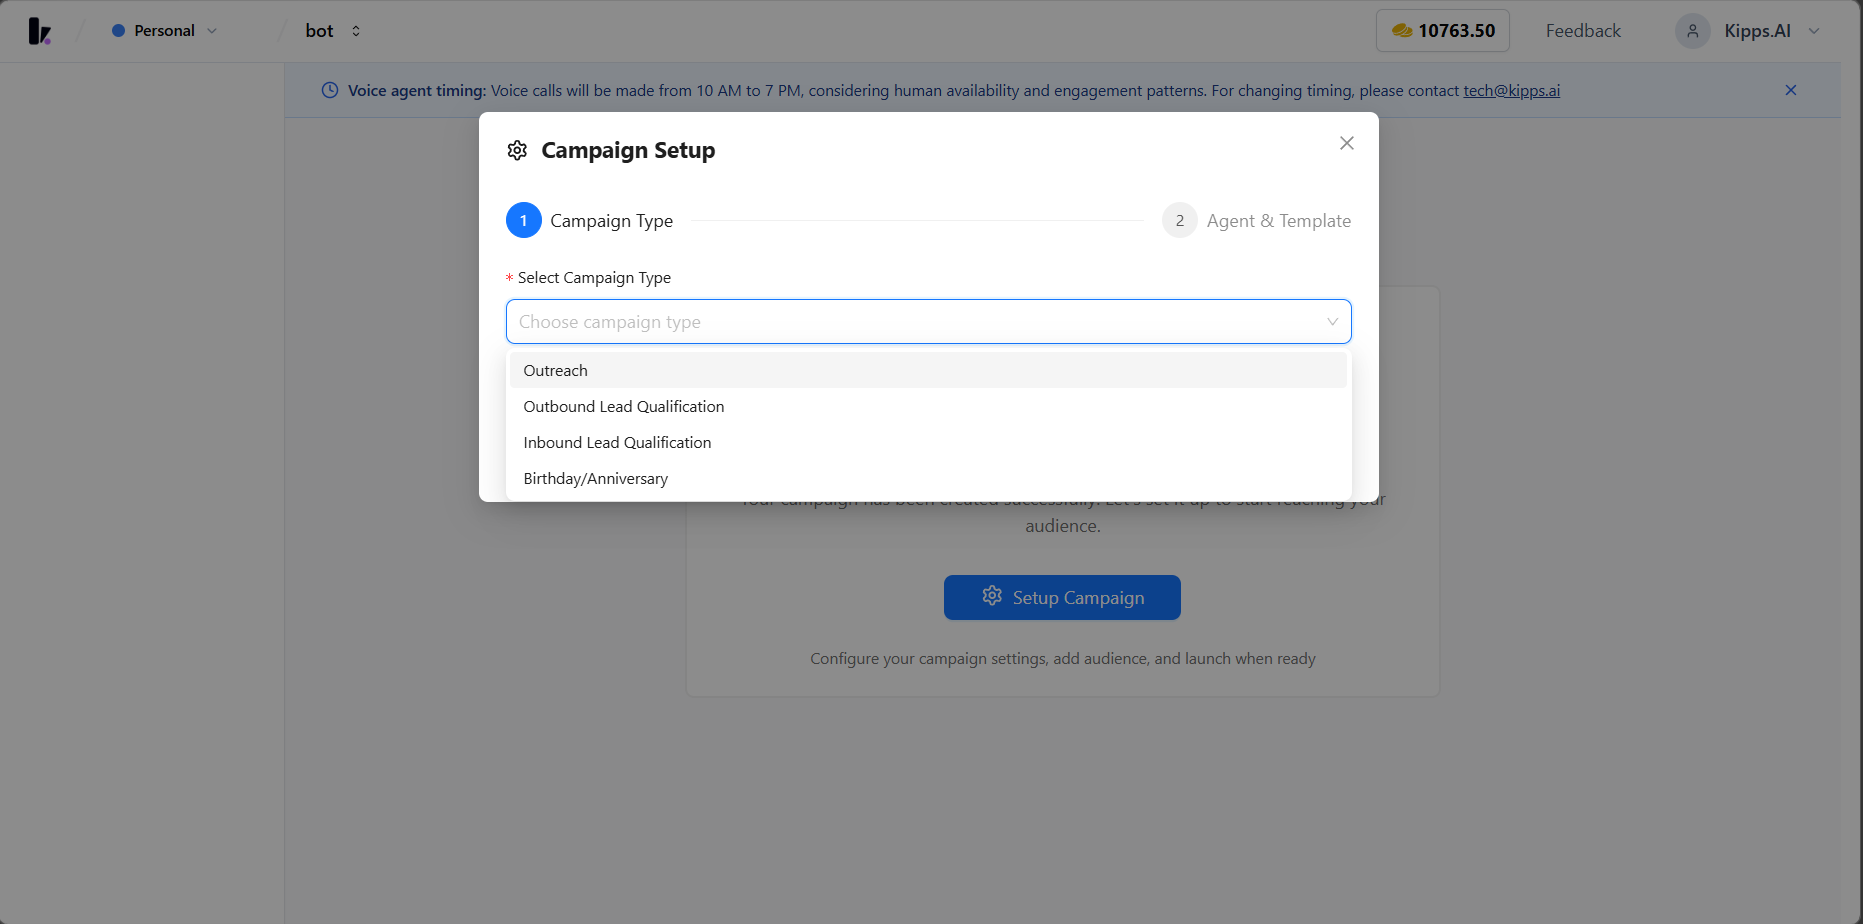
When to pick each type
- Outreach: Use when your sheet contains a list of contacts to message now or on a schedule.
- Birthday/Anniversary: Use when you want birthday/anniversary style messaging. You’ll be asked to select the relevant date field (for the contacts you target).
3.2 Step 2 — Select WhatsApp Agent + Template
In Agent & Template:
- Under Select Agent, choose a WhatsApp Agent.
- Select a WhatsApp Template from the available (approved) templates.
- Configure template parameters (if the template has placeholders).
- Click Finish Setup.
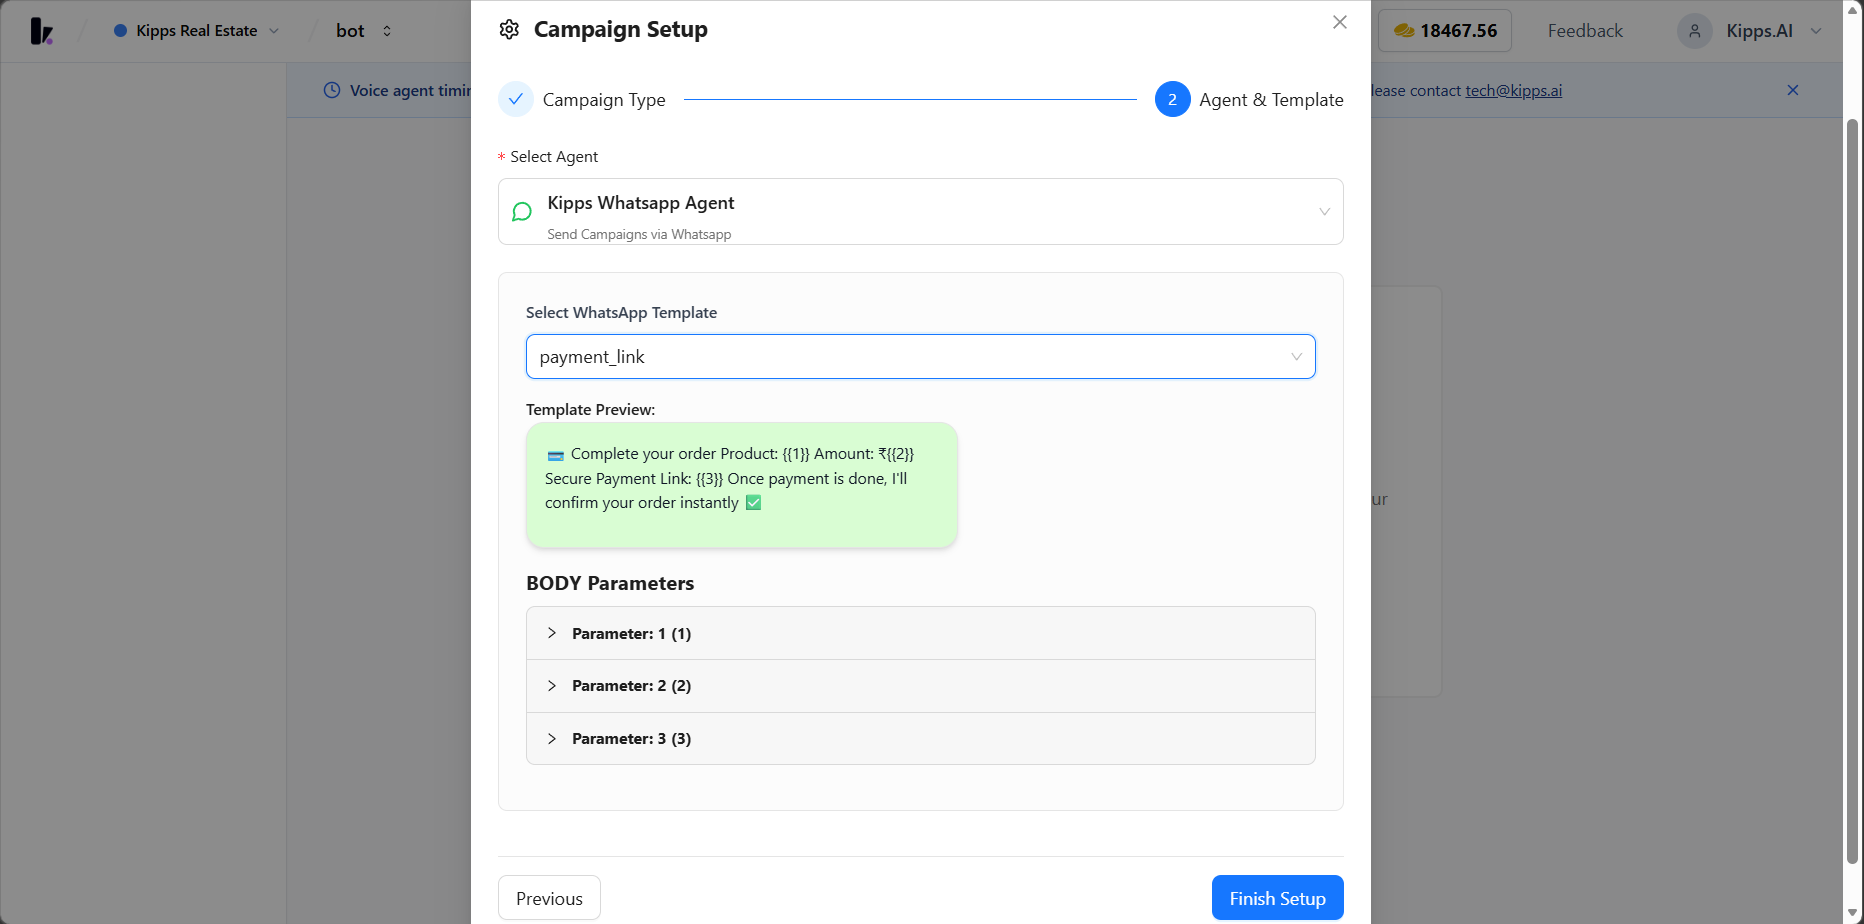
3.3 Configure template parameters (Important)
If your template includes placeholders like {{1}}, {{2}}, etc., you must configure each placeholder.
Common approaches:
- Use fixed values: same value for every message (example: a single offer text).
- Use dynamic values (recommended): map parameters to fields you will provide through the audience (Google Sheet).
If parameters are missing, the setup will not finish and the system will ask you to complete required fields.
4. Add Audience (Choose Google Sheet)
Once campaign setup is finished, you can add your audience.
- On the campaign page, click Add Audience.
- In the audience configuration screen, find Select Audience Source.
- Choose Google Sheet.
Connect Google (if needed), pick spreadsheet, pick sheet tab, map columns, and save configuration.
5. Connect Google
When you select Google Sheet:
- If Google is not connected, you will see Login with Google.
- Click it, complete the Google auth flow, then return to the campaign page and refresh if prompted.
If your organization uses multiple Google accounts, make sure you log in using the same account that was used for the integration.
6. Select Spreadsheet (Google Drive)
Under Google Sheet configuration:
- Click Browse Drive.
- Pick the spreadsheet from your Google Drive.
- The spreadsheet name will appear in the field after selection.
What this step does:
- It links your campaign to a specific spreadsheet ID.
- It enables the Select Sheet dropdown in the next step.
7. Select Sheet (Worksheet)
Each spreadsheet can have multiple tabs.
- Open the Select Sheet dropdown.
- Choose the sheet tab that contains your audience (example:
Sheet1,Leads,Contacts).
If the sheet is empty or doesn’t have a header row, you may not see mapping fields in the next step.
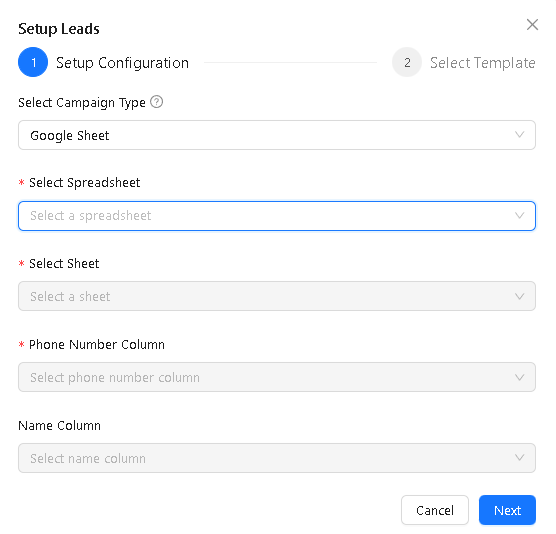
8. Map Columns (Required)
After selecting a sheet tab, you will see a Field Mapping section.
8.1 Required mapping
- Phone number mapping is required.
- The campaign configuration can’t be saved until the phone mapping is present.
8.2 Recommended mapping
- Name: recommended for personalization (example: “Hi Rahul”).
- Any additional fields you want to use for template parameters (example:
company,city,plan,date).
Example mapping:
- Spreadsheet: Kipps Testing
- Sheet: Sheet1
- Phone Column: Number
- Name Column: Name
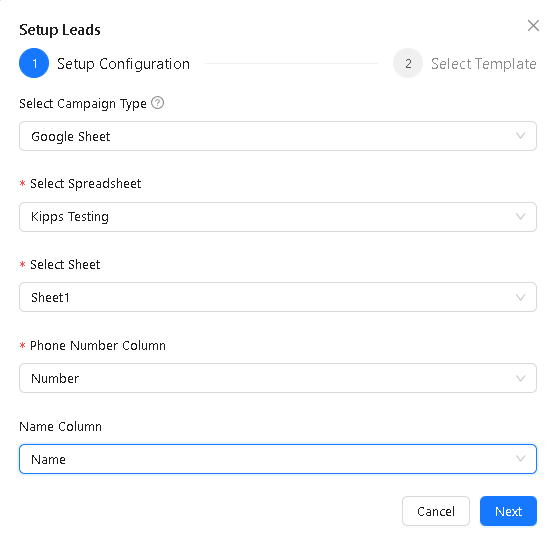
8.3 Starting Row Number (Optional but useful)
- Use Starting Row Number when you want to skip initial rows.
- Default is
1. - If you already processed the first 200 rows earlier, you can start from
201.
9. Save Audience Configuration
After spreadsheet selection + sheet selection + mapping:
- Click Save Configuration.
- You should see a success message confirming the Google Sheet configuration is saved.
If Save Configuration is disabled:
- The selected sheet may have no headers, or
- The phone number field is not mapped yet.
10. Schedule the Campaign (Start Instantly or Later)
Once setup and audience configuration are complete, use the Schedule button on the campaign page.
You have two options:
Option A — Start immediately
- Open Schedule.
- Select Start immediately.
- Save/confirm.
This starts sending messages right away.
Option B — Schedule for later
- Open Schedule.
- Choose a Start Date and (optional) End Date.
- Confirm the Timezone.
- Save/confirm.
This schedules the campaign and it will start at the selected time.
Scheduling notes
- If a campaign already has a future start date, opening Schedule will prefill the scheduled dates.
- If the campaign has already started, the primary action changes from Schedule to Pause/Resume.
Monitoring Campaign Performance
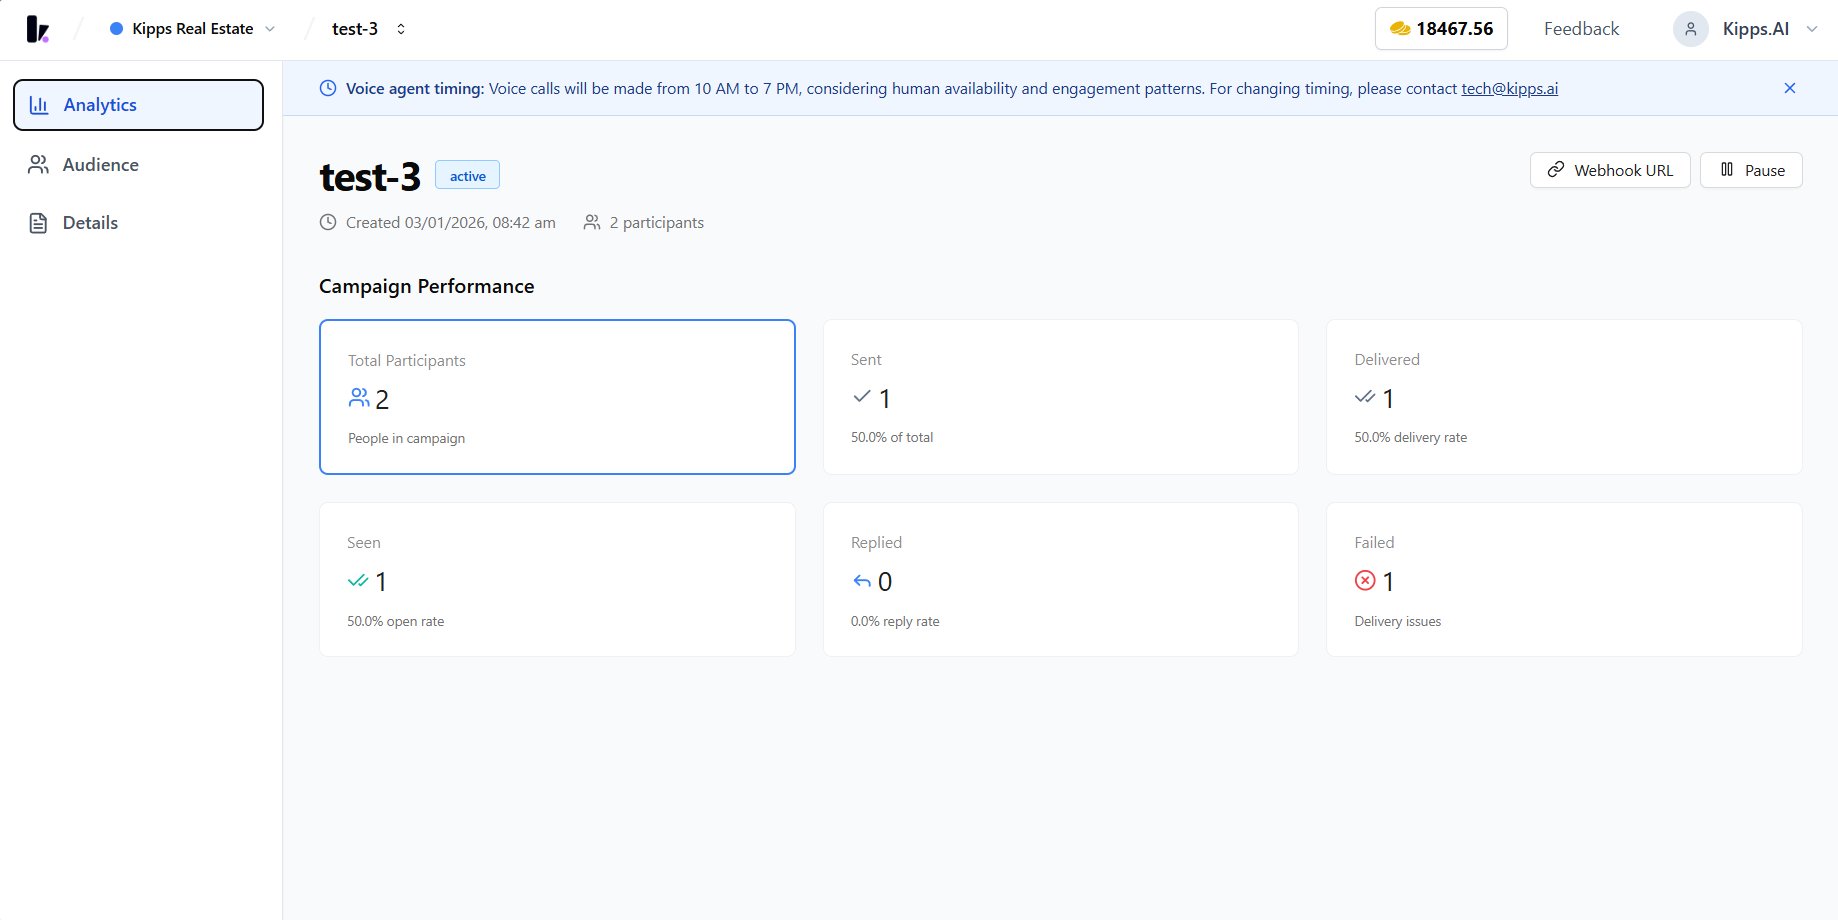
After the campaign is started (instantly or scheduled), you can monitor performance from the campaign details page.
View analytics
You can track:
- Total Participants
- Sent / Contacted
- Delivered
- Seen / Read
- Replied
- Failed
Audience list & filtering
In the Audience section you can:
- Search contacts
- Filter by status (sent/delivered/read/replied/failed/etc.)
- Download results
This is useful for quickly identifying failed deliveries or users who replied.
Download lead data
Click Download Leads CSV to export campaign results.
Common Issues & Fixes
Google Sheet shows “No headers found”
- Ensure row 1 contains a header row (example:
name,phone,city). - Remove merged header cells and keep each column title in a single cell.
- Re-select the sheet tab after fixing headers.
“Phone number mapping is required”
- In Field Mapping, map the phone number field to the column that contains phone values.
- Save configuration again after mapping.
Messages fail to send
Common causes:
- Template parameters not configured correctly
- Phone numbers not valid or not in the expected format
- WhatsApp template not approved or not available to the selected agent/number
Start by checking:
- Campaign setup: correct agent + template selected
- Audience mapping: phone column correct, no blank/invalid numbers
Features (Google Sheet Audience)
- Google Drive: select a sheet without manual IDs
- No CSV upload needed
- Phone number validation via required mapping
- Template personalization using sheet fields
- Analytics dashboard
- Pause/Resume after start
- Downloadable CSV reports
Best Practices & Tips
- Phone format: Keep phone numbers consistent (prefer E.164 if your WhatsApp setup requires it).
- Avoid blank rows: Remove trailing blank rows to prevent unexpected imports.
- Stable headers: Don’t rename columns mid-campaign unless you also update mapping.
- Preview before running: Verify the mapped columns match the intended fields (phone/name).
- Use scheduling: If you want to avoid sending during off-hours, schedule with the correct timezone.
Frequently Asked Questions
Does the campaign re-read the Google Sheet if I add new rows after the campaign starts? The campaign reads the Google Sheet at the time it processes each batch of contacts. If you add rows to the sheet while the campaign is running, those new rows may be picked up depending on how far the campaign has progressed. To ensure all intended contacts are included, finalize the sheet before starting the campaign.
Can I use the same Google Sheet for both WhatsApp and Voice campaigns simultaneously? Yes. Multiple campaigns can reference the same Google Sheet independently. Each campaign reads the sheet separately, so the same contact list can serve a WhatsApp campaign and a Voice campaign at the same time.
What template personalization is possible using Google Sheet columns?
Any column in your Google Sheet can be mapped to a template placeholder ({{1}}, {{2}}, etc.). For example, a "First Name" column can populate a greeting placeholder. Map columns during the campaign setup step. Only columns with consistent data produce reliable personalization.
Do I need to re-authorize Google Sheets for every new campaign? No. Once your Google account is connected to Kipps.AI, all accessible sheets are available in the campaign setup without re-authorization. You only need to reconnect if the Google authorization is revoked from your Google account settings.
What happens to contacts in the sheet that have duplicate phone numbers? Duplicate phone numbers in the sheet may result in the same contact receiving multiple messages. Clean the Google Sheet to remove duplicates before running the campaign. The platform does not automatically deduplicate sheet rows during import.
Related Articles